Tuesday, March 28, 2017

Readynas Radiator 4.1 firmware problem with SMB CIFS shares


The changes made to SMB protocol from version 1 to version 3, seems to have killed the share mode of access on readynas older systems.

Switching to user share mode and creating a user is a pain as well.

But the share name is entered as a user id in passwd, but not put up as a user in the gui, which is a huge hole when you switch from share to user.

the only method of fixing it is to install EnableSSHAccess and log in as root.  One can then set an SMB passwd on the shares that exist, and each will be accessible with that passwd on system thru so far and including windows 10.

Also other secured user access is then possible once the sharing is turned on if desired.  The users cannot access others storage w/o using group access features.

Of course this has a possibility of voiding any service you have with Netgear (warranty for 4.x devices is long gone).  But if you have any service agreements, don't do this w/o checking since it may impact your agreements for unauthorized user mods to devices.

To install ssh access for 4.x radiator do the following

Download EnableRootSSHAccess for your architecture from here

EnableRootSSHAccess

Original NV+ and 1100 systems are Sparc.  Pro and Ultra systems on 4.x will be Intel.  I'm not sure if Arm has a 4.x version.  All the ones I've seen with Arm are 6.0

then:

  1. Get the SSH bin file from the ReadyNAS web site. Click the Add-ons for RAIDiator 4.1.3+ link and scroll to the EnableRootSSH link. Download the bin file and store it on your local computer.

  2. Log in as admin on your ReadyNAS using a browser

  3. Update your ReadyNAS firmware (optional). This is under System > Update. Just click the Check for Updates button.

  4. Click the Local tab and click Choose File to find the EnableRootSSH.bin file that you previously downloaded. Upload this and follow the prompts.
 A restart of the Readynas system is required, if you have other users on the device.  (since some windows systems may work).  I doubt if any samba stacks such as one would have with shares on MacOS would work, but they may be impacted.

Install instructions from here;

http://blog.epdoc.com/2009/11/ssh-on-readynas-nv.html


CIFS mount problem on Linux, Error 12, can't allocate memory error


There is a workaround for this which is in the link below.

What worked however is this:

reg add HKLM\SYSTEM\CurrentControlSet\Services\LanmanServer\Parameters /v Size /t REG_DWORD /d 3 /f
sc stop  LanmanServer
sc start LanmanServer

Will have to research and update link with whatever is being done, but this worked for mounting my Google driver server windows 7 system.

Windows Xp so far has not shown the problem.  Other options have been necessary too, this is just the latest.

Occured on a Cubox debian Wheezy system on 3/27/2017 for me.

mount-cifs-mount-error12-cannot-allocate-memory

Monday, March 27, 2017

Microdata, Decision Data, and Western Dynex boards


These boards showed up in an auction and Al Kossow kindly directed my attention to the boards, sold after the system was scrapped.

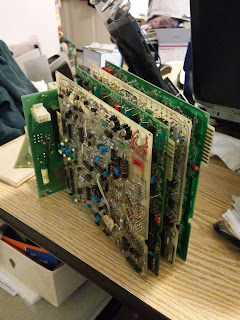
There is a clean set of spares from a 2400 RPM Dynex, probably a 6000 drive, including backplane and terminator.

There is a Decision Data + Intel manufactured processor and memory set, as well as an 8 slot backplane in the lot.

And there is a Microdata manufactured 1600 board set in the lot, but with Decision Data markings in the etch and some of the silkscreens.  This includes a larger 14 slot backplane.

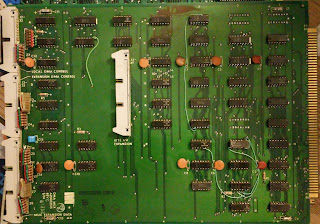
Included in the Microdata set, is a CPU set, DMA board set, 2950 (Decision Data badged), and one (or two) A20002613 8ways.  The 2613 had full modem control.

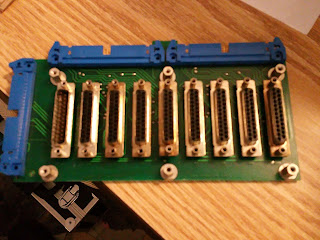
There is also an 8 port DB 25 board, which should work with any of the 8ways available, hopefully via ribbon cables.

There is an interesting cabling setup with an additional 50 pin connector on the 8 port connector that will have to be investigated.

Both of the backplanes are powered via molex connectors, rather than the Microdata Paddle board approach in the last slot.

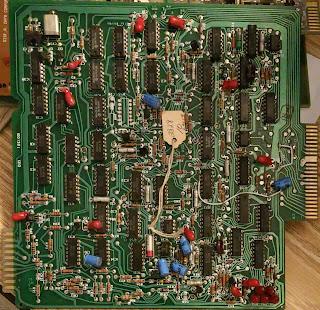
Boards from Western Dynex 2400 RPM drive, probably 10mb capacity.
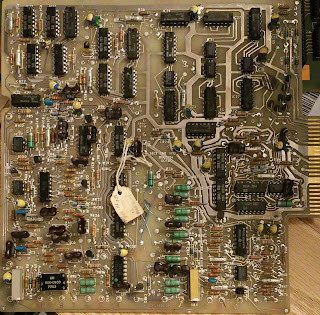
A2 Control

Tag says 2400RPM.  I am going to infer this was for a 10mb (5 over 5) drive, since I doubt many 5mb drives were made at 2400RPM

Closeup of service tag.  shows 2400RPM

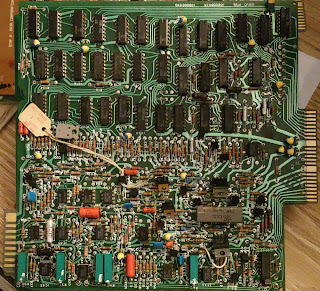
Sector Counter A1

Servo A3

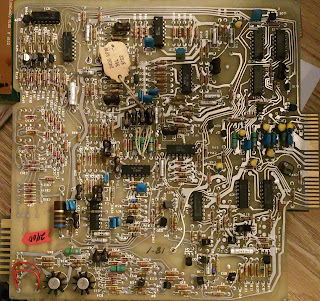
Data A4

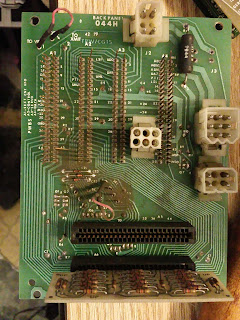
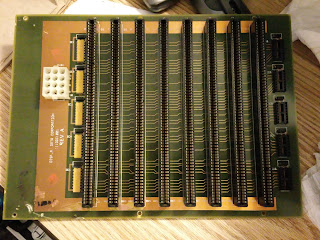
Backplane, Pin side, showing Terminator and input cable slot

A1 Sector Counter / Control
A2 Control
A3 Servo
A4 Data
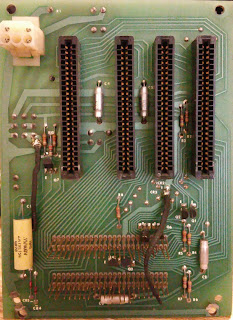
Backplane Component side.  Both sides have 3 level WW pins available on all pins

Set of boards in backplane, best guess as to location

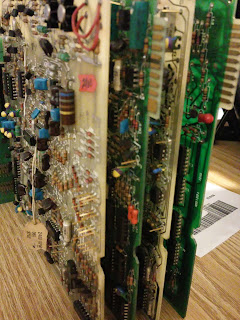
Closeup of the shot with the boards in backplane
Only one board identified as Servo is pretty certain.  I guessed from memory on the others.
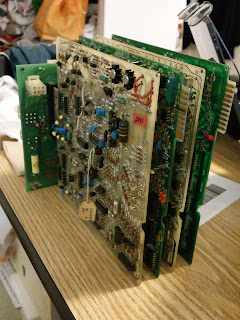
Closer shot of the boards in backplane

Decision Data processor set

8 Way connector Top 2 cables are probably from 2613.  not sure what the other one did


8 slot backplane.
Since there are no keyways in the backplane, and none on the 2901 cpu set boards, I'm guessing this is the backplane for the newer system.

Also it only hs the single 12 pin Molex power connection.  There is an 8 slot rear of board connector on the memory board below, probably to supply +5 and maybe a minus voltage to the memory array, so the backplane supply is probably enough +and- 12 to run the 2613's and a lot of +5 and ground
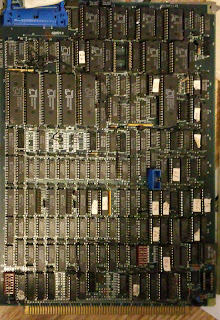
2901 cpu and firmware
Sadly one rom is missing, so no firmware disassembly is probably going to happen.
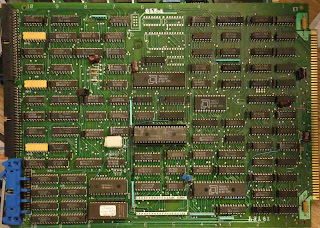
2910 and other logic in second CPU set board
A 40 pin chip / socket has been totally scraped off this, as well as maybe some other damage.  Worst damage of the lot.
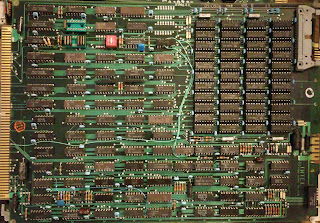
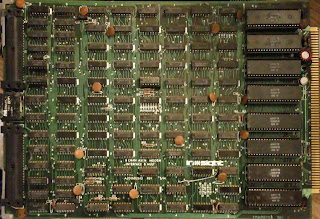
Intel Memory board
The Etch shows Intel (in Intel font) made this board.  All the chips are NEC though.  Guess all the work making the board didn't pay off for the Intel memory division, unless they distributed or resold NEC parts.
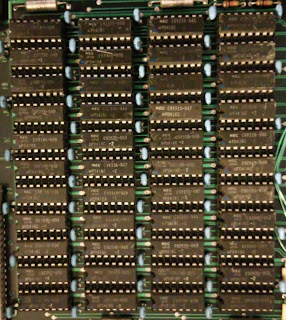
Memory array on the Intel board
The array is of 16K x 1 parts, and there are 11 parts in each column.  Suggesting single bit correction 2 bit detection ECC capability with the memory.

Total of 64K, which would align with what a Microdata 1621 firmware board would do.
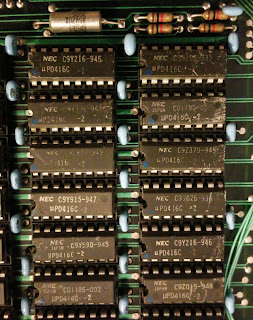
Memory chips with legible part#s
NEC UPD416C-2 parts  Date code 85 maybe on one chip?
NEC UPD416C-2  Link copied 3/2017
NEC UPD416C-2  PDF data sheet link copied 3/2017

200ns 16k x 1 memory Page Mode Dram

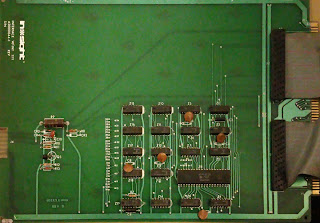
Microdata Compatable / manufactured (In*sight) boards
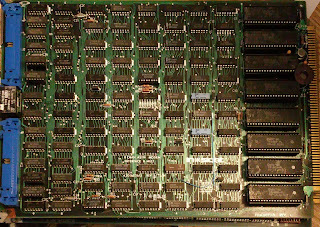
A20002613 8 way with modem control

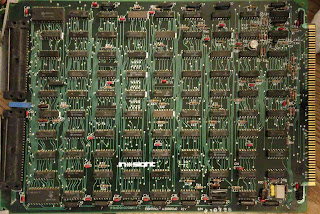
Microdata A20002515 DMA board

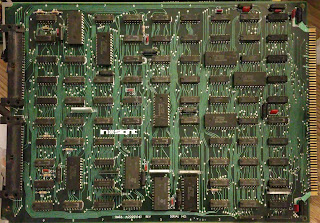
Microdata A20001242 Control CPU board

Microdata A20001043 Data CPU Board

Second A20002613 8 way with modem control

A20001044-1 Front panel interface

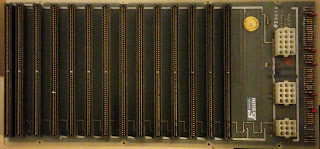
14 slot backplane for Microdata CPU. 
From the spacing and practicality of the design, the 1040 front panel board goes in the slot on the left in the backplane.  Microdata had a 12 slot  with 20 amps, and an 18 slot with 40 amps (or 20) of their own.

Some outfit named Elko Pacific made these backplanes.  The connectors do not match the most common Microdata part for their original backplanes.  CDC originated the backplane connector that Microdata used.

This connector may be from a 130 pin connector vendor who made parts for the later Reality 6000's 8000s, and Royale systems.  The 1040 backplane had a heavier bakelite / plastic component.
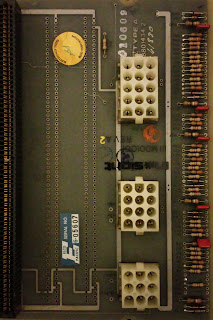
Closeup of Elko Pacific badge and power input
Serial numbering didn't match the style of Decision data which used such as 111DDxxxx numbering

Also the backplane termination is shown.
This is serialed 6-05607
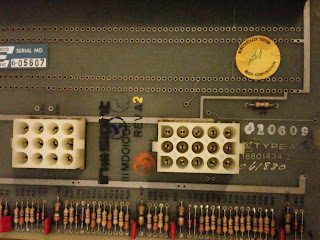
Closeup showing more etch info
Type A 18801434-2
also various other inspection stickers
111MD01001 is the Decision data style part number and appears to be possibly silkscreened on

Serial I/O DB-25 panel
Will to figure out if there is anything more than a multipurposing of the design to have the extra 50 pin connector.  The Microdata A20002613's would have used two 50 ribbon cables to the board.

Possibly another design board made by Decision Data used just a single 50 and omitted some signals.

When Microdata originally licensed the CPU to people, they had a single port RS232 with modem control board, a 4 way which had no scanner.

There were two 8 port boards with scanners, the 2612 and 2613.  The 2613 was designed by Bill Homans as one of his first projects.  Both of those boards had a scanner feature which was clocked around to present the status lines of each 8way to the software.  There was logic to "lock" the scanner when a line had a status change.  Ports could be disabled, in input listen and lock mode, or in interrupt driven output lock mode.

A single address starting @ 0x18 in the 1600 address space would control the board.  The board had one interrupt for the board, and usually used firmware assist to run the boards.

The original 1600 could run well with the later A20002614 and A20002615 designs, but did not do that well with the 2612 or 2613.

Microdata Reality used the 2614, 2615, and Irvine Computer Corp 80010001 8ways for I/O.

The 2614 and 2615 had only to have ground, transmit and receive to work.

The ICC 8way added flow control in and out in hardware with some additions of hardware to monitor the Reality I/O state.

Friday, March 10, 2017

Notes for running Windows 98 (or older OS's) on Rpi


Snip from a posting about making up a Raspberry Pi running QEMU running Windows 98.  Mainly a QEMU note.

This part needs to be done on a Windows based computer, not the Pi:
I broke out my copy of Windows 98 and followed this chaps guide to get the .img file needed for the emulator, copied it over to my Pi (into ‘/home/pi’ for ease of access).
Now back to the Pi:
Don’t worry about the Youtube video in the post above, that is for an older version of Raspbian, now Jessie has QEMU available and easily obtainable by typing:
sudo apt-get update && sudo apt-get install qemu -y
Time to test it. Navigate to ‘/home/pi’ and run:
qemu-system-i386 -localtime -cpu 486 -m 96 -hda win98.img
QEMU should pop up and begin launching Windows 98, when its loaded have a click around and then shut it down as you would a normal 98 machine.
When QEMU has shut off it’s time to apply…

******************

https://www.raspberrypi.org/forums/viewtopic.php?f=41&t=117228

I just installed debian jessie on a desktop PC. Ran the update and upgrade. And then I simply ran the apt-get install for qemu. That allowed me to do the entire win98 install on the desktop PC.

After installing qemu, I used the following command to create the img file:

qemu-img create win98.img 1G

Then I used the following command to install windows from a win98 ISO created from an original install disk.

qemu-system-i386 -localtime -cpu 486 -m 256 -cdrom d win98se.iso -boot d -hda win98.img

Doing that resulted in a quick, clean, problem-free windows 98 install. It bypassed all the Win98 installation problems I was having on the RPI. And this works much better anyway since the desktop is a much faster PC to work with.

After the win98 install, I took the resulting img file and copied it over to the PI. And then I used these instructions to get qemu running on the PI.

https://www.youtube.com/watch?v=nrq_VtrnhHE.

After qemu installed, I used the following command to run 98 on the RPI.

qemu -cpu 486 -m 256 -hda win98.img

It's slow, but seems to work great. The only problem I have found is it does not close cleanly. It always hangs on shutdown which means it always does a scandisk when it restarts. If anyone has any ideas how to fix that, I'd love to hear them.

Tuesday, March 7, 2017

vmx network setting notes


Vmware notes on selecting network adapters


https://kb.vmware.com/selfservice/microsites/search.do?language=en_US&cmd=displayKC&externalId=1001805

Advanced network settings
VMX-file parameters

Basic setup
MAC address handling
ESX - specific
VMware-tools related Wake on LAN
Advanced setup - experts only Advanced MAC address handling - experts only

other parameters related to network


Basic setup - see basic table for reasonable blocks

ethernet0.present = "false" Main-switch: set to "true" to enable the device.
This parameter works like a mainswitch - if it is set to "true" all other parameters related to the same device are parsed. If it is set to "false" the other parameters are ignored.

ethernet0.startConnected = "true" Silently defaults to "true"
set ito "false" f you don't want the nic to be connected at boot

ethernet0.virtualDev = "vlance"
ethernet0.virtualDev = "vmxnet"
ethernet0.virtualDev = "e1000"
On current VMware-versions you can use any of these 3
e1000 performs best but your OS may not come with the drivers
vmxnet needs drivers that come with the VMware-tools
vlance should work on all older OS without additional drivers

ethernet0.connectionType = "bridged"
ethernet0.connectionType = "hostonly"
ethernet0.connectionType = "nat"
ethernet0.connectionType = "custom"

ethernet0.connectionType = "monitor_dev"
Sets the connection type.
Silently defaults to "bridged"

also see additional notes

ethernet0.vnet = "vmnet0"
...
ethernet0.vnet = "vmnet9"
Sets the number of the used vmnet.
Only use with connection type "custom"
also see additional notes

top


MAC-address handling

ethernet0.addressType = "generated"
ethernet0.generatedAddress = "00:0c:29:40:7e:22"
ethernet0.generatedAddressOffset = "0"
This lines are added automatically on first start of a VM.
If you need a different MAC delete this lines and use those from the next block


ethernet0.addressType = "static"
ethernet0.address = "00:50:56:3e:86:29"
This settings have to be used to configure a
MAC-address manually.

Valid range:
00:50:56:00:00:00
00:50:56:3f:ff:ff


ethernet0.addressType = "static"
ethernet0.addressType = "generated"
ethernet0.addressType = "vpx"

top


advanced MAC-address handling

ethernet0.ignoreMACAddressConflict = "false"
I think this is another silent default - usually a Nic will not come up if the same Mac exists on the network.

ethernet0.noPromisc = "true"
This disables - well have a guess - yes , this disables promiscous-mode.
On Linux hosts you must be root to set nics into promiscous mode - read more

ethernet0.noForgedSrcAddr = "true"
This disables spoofing of Mac-address

ethernet0.reassignMAConResume = "true"
I guess this is another silent default - usually VMware tries to assign the same MAC after resume as it was used before resume.

ethernet0.checkMACAddress = "FALSE"
ESX and WS 6.5 - allows to set a MAC outside the usual range (experimental)
ethernet0.downWhenAddrMismatch = "false"
see knowledgebase

top


Tools related settings

ethernet0.allowGuestConnectionControl = "false" Disallow control of connection from inside the guest.
(Only works with guests that have VMware tols installed)
Silent default is "true"

ethernet0.disableMorphToVmxnet = "false"
Vlance-nics magically morph to VMXnet nics after tools-install.
Don't use ...

top


Wake on Lan

ethernet0.wakeOnPcktRcv = "false"
Workstation 6 and higher only
Set to "true" to enable WakeOnLan functions
Don't specify unless you really need it.

top


ESX specific ?

ethernet0.devName
ethernet0.exclusive
ethernet0.pvnID
ethernet0.networkName

Ethernet0.connectionType = "monitor_dev"
Ethernet0.devName = "vmnic0"
Ethernet0.networkName = "sciquestprod"
ESX - specific ?

top


Advanced setup
WARNING: don't use this unless you kow what you are doing

ethernet0.numRecvBuffers
ethernet0.numXmitBuffers

ethernet0.rxbw.limit
ethernet0.rxbw.queuesize
ethernet0.rxfi.droprate
ethernet0.rxfi.dropsize

ethernet0.txbw.limit
ethernet0.txbw.queuesize
ethernet0.txfi.droprate
ethernet0.txfi.dropsize

ethernet0.noReceiveAfterSend
ethernet0.yieldAfterSend

ethernet0.flashWriteable
ethernet0.forcedToBridged
Fine-tuning: don't ask me

ethernet0.features ="0"
Do you get poor UDP-performance with vmxnet-device ?
Try this - see forumpost
May speed up performance when running ghost ...


ethernet0.allow64bitVmxnet = "true"
ethernet0.allow64bitVlance = "true"
ON 64-bit hosts VMware likes to assign E1000 - but you can force it to use different adapters by useing this lines
along with the appropriate virtualDev-entries.

ethernet0.opromsize = ?
Boot ROM size - don't know details

ethernet0.features = "0x2"
Enable TCP Segmentation Offloading (TSO) for a Windows virtual machine on ESX 2.x
Reference: knowledgebase 1465

top


related parameters

These parameters are somehow related but not dependant on the main-switch that

vlance.noOprom = "true"
vmxnet.noOprom = "true"
Recent VMware-versions allow Network-boot.
If you know that you don't need this, you can free some memory by using this

ethernet.e1000.available = "true"
ethernet.vlance.available = "true"
ethernet.morphNICs = "true"
ethernet.perfMonInterval = ?
Don't use

vnet.dontProbe = "false"
Sometimes Windows-guests have problems to probe the
virtual Nics at boot-time: try this


Don't use it if you don't need it - it affects performance

top


There are two different ways to assign Virtual Nets:
The easy way uses one out of three options:
ethernet0.connectionType = "bridged"

ethernet0.connectionType = "hostonly"
ethernet0.connectionType = "nat"

The expert way uses a combination of 'connectionType' and "vnet"
ethernet0.connectionType = "custom"
and the exact number of the VNET you want - like
ethernet0.vnet = "vmnet0"
Lets have an example: you have two bridged networks on Player: vmnet0 and vmnet2
If you use
ethernet0.connectionType = "bridged"
ethernet1.connectionType = "bridged"
the second ethernet device will not come up.

If you use
ethernet0.connectionType = "custom" ethernet0.vnet = "vmnet0"
ethernet1.connectionType = "custom"
ethernet1.vnet = "vmnet2"
instead - both devices will come up.


http://sanbarrow.com/vmx/vmx-network-advanced.html
 

Sunday, March 5, 2017

Notes on disabling pad when USB mouse is plugged in


How To Turn Off Touchpad When Mouse Is Connected In Windows 10/7/8.1

Earlier this year, I talked about configuring Mac OS X to automatically disable the trackpad when a mouse is connected to the MacBook. This feature comes in handy for those users who always use a mouse and don’t want to use the built-in trackpad after connecting the mouse.
In Windows operating system, a graphical option to automatically turn off the touchpad when a mouse is connected can be found under Mouse Properties in Control Panel. In addition to that, if you’re running Windows 8.1 with the recently released August Update, you can now configure Windows 8.1 to automatically turn off the touchpad when a mouse is connected to your netbook or notebook right from PC settings.
If you’re using a notebook or netbook equipped with ELAN or Synaptics touchpad, an option labelled Disable internal pointing device when a mouse is connected should appear under Mouse Properties.\
Following are the steps you need to follow in order to automatically disable touchpad when a mouse is connected in Windows 10, 8/8.1 and Windows 7.

Turn off touchpad when mouse is connected using Control Panel

Method 1 of 4
For Windows 10
Step 1: Open Settings, click Devices icon and then click Mouse & touchpad.
Step 2: Under Touchpad section, turn off the option labelled Leave touchpad on when a mouse is connected.
Method 2 of 4
(This method should work fine on Windows 10, Windows 7, and Windows 8/8.1)
Step 1: Open Control Panel by navigating to Start menu and then clicking Control Panel.
Step 2: Change the default View to Small icons. Look for the entry named Mouse and click on the same to open Mouse Properties.
Step 3: Switch to the ELAN or Device Settings tab and look for an option titled Disable when external USB pointing device plug in or Disable internal pointing device when external USB pointing device is attached. Check the same option and then click Apply button. That’s it!
If the above option isn’t present and you’re laptop is using Synaptics touchpad, you can try out the given below instructions to see the above mentioned option.
Method 3 of 4
NOTE: We recommend you create a backup of Registry before changing default entries.
Step 1: Open Registry Editor. To do so, open Run command by simultaneously pressing Windows + R keys, type Regedit.exe in the field followed by enter key.
Click on the Yes button when you see the UAC prompt.
Step 2: In the Registry Editor, navigate to the following key:
HKEY_LOCAL_MACHINE\SOFTWARE\Synaptics\SynTPEnh
Step 3: On the right-side, create a new DWORD value and rename it as DisableIntPDFeature. Finally, change its value to 33 (make sure that Hexdecimal is selected under Base section).
Step 4: Close the Registry Editor and reboot your PC to see Disable internal pointing device when external USB pointing device is connected option. Good luck!
Method 4 of 4
Disable touchpad when mouse is connected in Windows 8.1
Step 1: Open PC settings. To do so, move the mouse cursor to the upper or lower right corner of the screen to see the Charms bar, click Settings and then click Change PC settings option.
Step 2: On the left-pane of PC settings, click PC and devices, and then click Mouse and touchpad.
Step 3: Here, on the right-side, look for the option titled Leave touchpad on when a mouse is connected and turn off the same to automatically turn off the touchpad when you connect a mouse to your Windows 8.1 notebook or netbook. That’s it!