this also references two other blogs. One is copied because it is no longer accessible (guy was using wordpress, probably got hacked).
I’ve been trying to get the Raspberry Pi to run as an Apple Time
Machine server for a while now. I originally wanted to get it going
under Arch Linux for ARM but after numerous attempts without any luck I
decided to switch over to the Raspian image. I’ll assume that you’ve
already got the Pi up and running with a static IP address…
What you need:
- Raspberry Pi (I’ve got the B model with 512MB of RAM) with a static IP!
- Memory Card with Raspbian preloaded (I used 2012-12-16-wheezy-raspbian.img)
- External HDD with power supply like
this
- Networking devices and cables (Ie: router/ switch)
1- Formatting the external HDD
Firstly you need to use a mac to format the external HDD to the case
sensitive Mac Journalled file system. To do so, take your external HDD
and plug it into a mac running some kind of OSX and open up Utilities
> Disk Utility. From the menu on the left containing all the
drives connected to the mac, select the external HDD. Be 100% sure
you’ve selected the right drive as we are going to erase all data on the
selected drive. With the correct drive selected select the erase option
from the horizontal menu on the right hand side of the window.
To format the drive correctly select
Mac OS Extended (Journaled) and name the device anything you like, I chose to name my drive
TimeMachine. Hit
Erase.
Once the drive has finished formatting move over to the next option in the menu,
Partition.
Here we want to create one partition for the whole drive so select the options below and then hit
Apply;
Partition Layout: 1 Partition
Name: Time Machine
Format: Mac OS Extended (Journaled) – case sensitive if possible
Size: Largest possible (Should already be filled out)
2 – Getting the Raspberry Pi ready for the Mac File System
Firstly, let’s go ahead and remove the HDD from the mac and plug it
into the Pi. After doing so we are able to get some vital information
about the external HDD from the Pi’s bash terminal. We need to know the
UUID of the partition we created using
Disk Utility on the mac. To do so we use the command:
$ sudo blkid
Please make a note that the $ should not be included in the actual
command, it’s just to signify the use of a non-root bash terminal.
Anyway after inputting the command and hitting enter you will be
prompted for the users password. After that all the connected devices
containing storage media will be listed. If you, like me, only have the
one HDD attached you should be looking down at
/dev/sda1 where /dev/sda is the path to the device and
/dev/sda1 is the path to the first and, in most cases, only partition. Please make note of the long UUID for the partition labled “
TimeMachine”
We now need to download and install the correct support for the Mac’s
file system so that we can go ahead and mount the partition later on..
But first we must run an update to make sure everything is current:
$ sudo apt-get update
To then install the support for the partition run the command:
$ sudo apt-get install hfsplus hfsutils hfsprogs
You will be prompted for a Y/n answer once or possibly multiple times, hit
y
and enter at each prompt. The Pi will start downloading all
the necessary packages and automatically install them. Once it is all
finished you will be given the command prompt back.
3 – Mounting the TimeMachine partition to a newly created directory
These next few steps require that we have a directory created to mount the
TimeMachine partition to so let’s go ahead and create that quickly…
$ sudo mkdir /mnt/TimeMachine
Now we are going to create a more permanent mounting scheme using the
/etc/fstab file. The
fstab file
is read and acted upon every time the system boots and automatically
mounts the drives listed to the directories listed. In a way it’s like a
boot script but just for mounting partitions of media to given
directories. To edit the file we must open it as the root user in a text
editor with the command:
$ sudo nano /etc/fstab
Now the terminal will change to a text editor with a list of possible
commands at the bottom of the screen. With the arrow keys navigate to
the last line of the file and input:
UUID=”XXXX-XXXX-XXXX-XXXX” /mnt/TimeMachine hfsplus rw,force,exec,auto,users 0 3
Where the
XXXXs represent the UUID that you made a note of
in the previous step (2). After doing so use CTRL + O to write the data
out to the file, overwriting the previous file… So make sure you are
only adding a line to the bottom and not erasing any of the other data.
CTRL + X to exit. Also please note that now one of the external HDD’s
partitions is in the
/etc/fstab file therefore the Raspberry Pi
WILL NOT boot without the HDD attached to the USB port…
Please remember this as it’s caught me out on a few occasions.
Now lets reboot the Raspberry Pi, remembering that the
fstab file will auto mount the
TimeMachine to the
/mnt/TimeMachine directory.
After the reboot is completed navigate to the directory with the
TimeMachine partition and create a test directory to check everything is working
$ cd /mnt/TimeMachine
$ sudo mkdir test
Also use the
mount command to check that
/dev/sda1 is mapped to
/mnt/TimeMachine. Also make sure that the letters
rw are in the same result.. ensuring that we have read/write access to the partition.
The final part of step 3 is to give the user
pi ownership
over the partition as this is the user we will be using to log into the
share from the Mac(s). We do so with the following command:
$ sudo chown -R pi /mnt/TimeMachine
4 – Getting Netatalk and Avahi installed
Finally we need to install the services that the Pi will be using to
communicate with the Mac’s on the network. To accomplish this task we
must install a bunch of packages and then install Netatalk from source.
Netatalk is the package used to advertise the
TimeMachine shared drive and communicate the back-up data. Install the previously mentioned packages with:
$ sudo apt-get install avahi-daemon libavahi-client-dev libdb5.3-dev db-util db5.3-util libgcrypt11 libgcrypt11-dev
As in step 2 you will be prompted, select Y at each prompt.
Now we are going to grab Netatalk 3.0 (not 3.0.1!) from sourceforge and compile it from source. Please follow closely below…
$ cd
$ wget http://sourceforge.net/projects/netatalk/files/netatalk/3.0/netatalk-3.0.tar.bz2
Once Netatalk has finished downloading we need to extract it:
$ tar xvfj netatalk-3.0.tar.bz2
The contents of the tar-ball will be extracted to
/home/pi/netatalk-3.0 so we need to enter that directory and get compiling! Note that compiling might take a while on the Pi!
$ cd netatalk-3.0
$ ./configure –with-init-style=debian –with-zeroconf
$ make
$ sudo make install
5 – Configuring Netatalk for a Time Machine share
Now with Netatalk and the other misc packages installed we can go
ahead and configure Netatalk. For those of you familiar with Samba, the
Netatalk configuration file should seem quite similar. To configure
Netatalk we edit the file with:
$ sudo nano /usr/local/etc/afp.conf
Make the file look like this, without the <<< comment of course):
;
; Netatalk 3.x configuration file
;
[Global]
; Global server settings
hostname = TimeMachine RasPi
afp listen = 192.168.2.253 <<< THE RASPBERRY PI’S STATIC IP HERE
log file = /var/log/netatalk.log
log level = default:info
[Homes]
basedir regex = /home
cnid scheme = dbd
; Display each user home directory in this format
home name = Home: $u
[Time Machine]
; Our Time Machine volume
path = /mnt/TimeMachine
cnid scheme = dbd
file perm = 0660
directory perm = 0770
time machine = yes
Now save the file with CTRL + O and enter, use CTRL + X to exit.
Now we must get the Netatalk and Avahi services running with the commands:
$ sudo /etc/init.d/netatalk start
$ sudo /etc/init.d/avahi-daemon start
With the services running there is just one more thing to do on the Pi, set them to start at boot.
$ cd /etc/init.d/
$ sudo update-rc.d netatalk defaults
You will get two lines, the second looks like a bit of an error, don’t worry it’s fine.
5 – Connecting from the Mac(s)!!!
Now we are ready to go back to the Mac(s) and start backing up! At the desktop in finder hit; Go > Connect to Server and type
afp://XXX.XXX.XXX.XXX
Where XXX.XXX.XXX.XXX is your Pi’s IP.. It should prompt you for a
user name and password.. use the login credentials you use for logging
into your pi.. Ie; pi & PASSWORD
You should now see the share in a finder window.. Go ahead and set it
up as a Time Machine drive under Settings > Time Machine > Select
Disk
On a final note, I’ve found it to be quite slow, but after that first initial back up it’s fine. I’ll leave the rest up to you..
Tom
This guide is a re-hash of these two guides:
Simon’s Guide
Iurii’s Guide
Simon's guide is also a dead link, copied from Archive.org here.
refer to http:/andadapt.com/2012/09/06 blog entry in archive.org (snapshot was on 9/10 to catch the entry)
Posted by
Simon Wheatcroft on September 6, 2012
Since getting my Raspberry Pi I have installed a few different
operating systems and had a good little mess about. One great use I
have found for it is plugging in external drive and utilising it as a
Time Machine / Time Capsule backup device for my Mac’s. At such a low
price point with a 2Tb drive you can have a working time capsule for
under £100! Certainly an attractice prospect for backups!
(This little HOWTO assumes you are running Raspbian)
There are a few steps you need to take in order to get this working,
as you will need the Raspberry Pi to support HFS+ as well as running AFP
to enable Time Machine.
HFS+
To enable HFS+ you should install the following
sudo apt-get install hfsplus hfsutils hfsprogs
This will install the necessary packages to mount the HFS+ formatted drive.
Getting the drive to mount as read/write can be achieved by the following command
mount -o force /dev/sdx /mnt/blabla
It is also worth noting that if the drive appears as sdb the actual data on the partition will be one higher so sdb1.
If the drive doesnt mount running a fsck first can help
fsck.hfsplus -f /dev/sdaX (change X to your appropriate drive)
Hopefully this should see your HFS+ drive mounted under raspbian.
Now all we need to do is share the drive over AFP and enable Time
Machine.
AFP + Time Machine
We need to install a few packages before we can move onto installing
AFP support, as netatalk requires a DB as well as encryption.
sudo apt-get install avahi-daemon libavahi-client-dev libdb5.3-dev db-util db5.3-util libgcrypt11 libgcrypt11-dev
Once all dependencies are installed download the latest source code of netatalk. After unzipping build with the follow commands
./configure –with-init-style=debian –with-zeroconf
make
make install
Now we should have a working install of netatalk which gives us AFP
support for the drives we mount using HFS+. All that is left is to
configure afp.conf and start netatalk as a service.
afp.conf is located in /user/local/etc/
Open this file and edit as appropriate by following the instructions
at netatalk. However for a simple get started setup the following will
give you a drive shared to be used as a Time Machone backup.
[Global]
; Global server settings
uam list = uams_guest.so
[Time Machone Raspberry]
path = /mnt/test
time machine = yes
With everything configured all that is left to do is run netatalk and
your Time Machone backup will appear in the finder under OS X.
This is a very rouch guide on how to get everything running under
raspbian but hopefully it will providers a jumping off point for further
research in order to fine tune the setup to exactly how you want it.
Other guy's guide
Time Capsule for $25
The real article name might be something like: Configuring Raspbery Pi to serve like a Time Capsule with Netatalk 3.0 for Mountain Lion. But it's too long ;)
Here I will describe the process of using
Raspberry Pi
like a Time Machine in my network. To be able to backup your MAC's
remotely (Like it would be NAS of some kind). It assumes you have a
Raspberry Pi and have installed a Raspbian there and have a ssh connection, or somehow having access to it's console.
Refer to my previous article for details.
Now that we have a Pi that is ready for action let's animate it. So to
make it suit you as a Time Capsule (NAS) for your MAC's you need to do
those basic steps:
- connect and configure USB hard drive(s)
- install support of HFS+ filesystem to be able to use MAC's native filesystem
- make mount (auto-mount on boot) of your hard drive
- install Avahi and Netatalk demons
- configure Netatalk daemon to make it all serve as a Time Machine
- configure avahi demon
- put avahi and netatalk demons into autolaunch on system boot
- ENJOY.
1. Setup a Hard drive.
I assume you know what you are doing and understand you have to have a
hard drive formatted under your mac's HFS+ filesystem. That you, like
me, used as an external hard drive for backups before this. Just for
example. Or bought it... Whatever. One word you will need (or assume you
have) an external USB drive to follow me farther.
Start your drive (in case it has external power). I think Pi would
handle only drives with external power. But who knows ;). And connect it
to your Pi. Let it spin for some seconds to be recognized.
Now connect to console of your Pi and let's roll.
leopard$ ssh pi@192.168.1.140
pi@192.168.1.140's password:
Linux raspberrypi 3.2.27+ #250 PREEMPT Thu Oct 18 19:03:02 BST 2012 armv6l

The programs included with the Debian GNU/Linux system are free software;
the exact distribution terms for each program are described in the
individual files in /usr/share/doc/*/copyright.

Debian GNU/Linux comes with ABSOLUTELY NO WARRANTY, to the extent
permitted by applicable law.
Last login: Mon Oct 29 01:04:39 2012
pi@raspberrypi ~ $
As you can see I have a clean system installed from latest (as for 24.11.2012) downloaded image.
Let's do some magic. Because Raspbian does not support Apple's
filesystem out of the box. At least we need to mount it write enabled.
Which is not set up by default too. SO let's start from typing command
blkid under root and looking at output.
pi@raspberrypi ~ $ sudo blkid
/dev/mmcblk0p1: SEC_TYPE="msdos" UUID="8B12-9112" TYPE="vfat"
/dev/mmcblk0p2: UUID="AAAAAAA-1111-1111-......." TYPE="ext4"
/dev/sda1: UUID="AAAAAAA-1111-1111-......." LABEL="Time Machine" TYPE="hfsplus"
/dev/sda2: LABEL="Data" UUID="1234567890......." TYPE="ntfs"
pi@raspberrypi ~ $
Note UUID of your device. Mine is called
sda1 and has a partition type
hfsplus. Hurray! Drive is connected and is recognized by Pi.
2. Install support of AFP filesystem (MAC's native).
Now let's install tools we need for HFS+ filesystem mounting. We need to mount it RW to be able to backup.
pi@raspberrypi ~ $ sudo apt-get install hfsplus hfsutils hfsprogs
Press
"y" in the process of install. You will get HFS+ support libraries installed. So let's move on to mounting.
After this you should be able to mount your HDD. You may try it or skip to making permanent mounting config via
/etc/fstab (Step 3).
pi@raspberrypi ~ $ sudo mount -o force /dev/sda1 /mnt/TimeMachine
pi@raspberrypi ~ $ cd /mnt/TimeMachine
pi@raspberrypi /mnt/TimeMachine $ ls -l
total 116
drwxr-xr-x 1 root      99      6 Jan 11  2012 Backups.backupdb
drwxrwxrwx 1  501 dialout     31 Feb  1  2012 !DVD-s
-rwxr-xr-x 1 root root    115716 Sep  1 07:23 tmbootpicker.efi
pi@raspberrypi /mnt/TimeMachine $
You may see your files from a HDD. Hurray! Again ;). Btw you can look at how is your device was mounted by typing
mount command into prompt. It will show your mounted volume and mode it was mounted. So you will see something like this:
pi@raspberrypi /mnt/TimeMachine $ mount
/dev/root on / type ext4 (rw,noatime,user_xattr,barrier=1,data=ordered)
devtmpfs on /dev type devtmpfs (rw,relatime,size=118872k,nr_inodes=29718,mode=755)
tmpfs on /run type tmpfs (rw,nosuid,noexec,relatime,size=23788k,mode=755)
tmpfs on /run/lock type tmpfs (rw,nosuid,nodev,noexec,relatime,size=5120k)
proc on /proc type proc (rw,nosuid,nodev,noexec,relatime)
sysfs on /sys type sysfs (rw,nosuid,nodev,noexec,relatime)
tmpfs on /run/shm type tmpfs (rw,nosuid,nodev,noexec,relatime,size=47560k)
devpts on /dev/pts type devpts (rw,nosuid,noexec,relatime,gid=5,mode=620)
/dev/mmcblk0p1 on /boot type vfat (rw,relatime,fmask=0022,dmask=0022,codepage=cp437,iocharset=ascii,shortname=mixed,errors=remount-ro)
/dev/sda1 on /mnt/TimeMachine type hfsplus (rw,relatime,umask=22,uid=0,gid=0,nls=utf8)
Note last line with
/dev/sda1 mounted in mode
"rw". Yes everything works well. Let's move on.
3. Make mount (auto-mount on boot) of your hard drive
Let's create a directory for our new tome. We will need this to mount filesystem.
pi@raspberrypi ~ $ sudo mkdir /mnt/TimeMachine
Lets unmount our tome (in case you did tested it exists with me).
pi@raspberrypi ~ $ sudo umount /dev/sda1
And add a proper
fstab entry to auto-mount this hard drive on boot. Open fstab:
pi@raspberrypi ~ $ sudo nano /etc/fstab
And add a line to the end of the file, indicating our Time Machine tome mounting preferences. Mine was:
UUID="AAAA-BBBB..." /mnt/TimeMachine hfsplus rw,force,exec,auto,users 0 3
Where
AAAA-BBBB... is your devise UUID from that
blkid command remember?
I used UUID to be sure it won't matter if I'll switch hard drives places in USB ports. But you may use
/dev/sdXX, where
XX is your device counting numbers in
/dev. Mine in this case was
/dev/sda1.
Note: You can skip reboot.
Let's now do a reboot to make sure it all spins in automatic mode ;).
pi@raspberrypi ~ $ sudo reboot

Broadcast message from root@raspberrypi (pts/0) (Wed Nov 21 19:13:49 2012):
The system is going down for reboot NOW!
After system boots up run
mount command to make sure we are ok in
rw mode. Btw you may play with commands:
# to unmount volume:
pi@raspberrypi ~ $ sudo umount /dev/sda1
# to mount again:
pi@raspberrypi ~ $ sudo mount UUID="AAAA-BBBB..."
While you will find your string. BTW you can read about how and why in /etc/fstab manual
here... Or google about it.
Note: if your HFS+ tome does not mount and/or mounted read only. You should try to run fsck for hfsplus partition type manually.
pi@raspberrypi ~ $ sudo fsck.hfsplus -f /dev/sda1
Anyway we must now have an
rw mode
HFS+ volume mounted and ready for our Time Machine. So Lets move on...
Checking your user permissions. As we will use user "
pi" farther
along the article we must add him ability to manage Time Machine data.
(In case you are not mounting empty drive). You should consider changing
all the data owner to user "
pi" to make sure we will be abler to backup in future:
pi@raspberrypi ~ $ sudo chown -R pi /mnt/TimeMachine
4. Install and configure Avahi and Netatalk demons
First make sure you have the latest packages lists, running:
pi@raspberrypi ~ $ sudo apt-get update
And updating what necessary.
Now install all the required packages with db and encryption support in
order Avahi and Netatalk demons to support for HFS+ filesystem:
pi@raspberrypi ~ $ sudo apt-get install avahi-daemon libavahi-client-dev libdb5.3-dev db-util db5.3-util libgcrypt11 libgcrypt11-dev
After this is complete we will have almost everything required for our little demon.
Download and unpack 3.0.0 (latest, as for now is 3.0.1 but I had
problems with it spinnig) Netatalk demon sources. For e.g. using
command:
$ wget http://somesite.com/photos.zip You may get Netatalk at
SourceForge. And unpack using e.g.
tar:
$ tar -xvf netatalk-3.0.0.tar.bz2
After you are ready with unpacked netatalk distribution go ahead and
make custom configuration of it. Enter directory of unarchived netatalk
and execute command:
pi@raspberrypi ~/netatalk-3.0 $ ./configure --with-init-style=debian --with-zeroconf
It will do the proper configuration for our needs. After this is done run:
pi@raspberrypi ~/netatalk-3.0 $ make
pi@raspberrypi ~/netatalk-3.0 $ sudo make install
5. Configure Netatalk daemon to make it all serve as a Time Machine
Now when you will have all this done go edit a configuration file of
Netatalk. From version 3.0 it is located in /usr/local/etc and has
Samba-like look. You can symlink this file to /etc/afp.conf if you
wish...
pi@raspberrypi ~ $ sudo nano /usr/local/etc/afp.conf
And insert this sample configuration. This config file works with latest
edition ( now it is 10.8.2 ) of OS X Mountain Lion. So the config:
;
; Netatalk 3.x configuration file
;

[Global]
; Global server settings
; Name of your computer in apple devices network
hostname = TimeMachine Pi
; IP of your Pi
afp listen = 192.168.1.140
; logging config
log file = /var/log/netatalk.log
log level = default:info

[Homes]
basedir regex = /home
cnid scheme = dbd
; Display each user home directory in this format
home name = Home: $u
[Time Machine]
; Our Time Machine volume
path = /mnt/TimeMachine
cnid scheme = dbd
file perm = 0660
directory perm = 0770
time machine = yes

; Example to add a new static share:
; [My AFP Volume]
; path = /path/to/volume
It is quite well commented so you will be able to copy-paste and edit ;).
6. Configuring AVAHI services
Now you would probably want to have a Time Capsule as a separate share in your network shares.
Note this step is optional. But
if you plan to use your pi for more than 1 thing, like I do... I'd
recommend to do it. Create a special afpd services configuration file by
executing:
pi@raspberrypi ~ $ sudo nano /etc/avahi/services/timecapsule_afpd.service
Then add this contents to file:
<?xml version="1.0" standalone='no'?>
<!DOCTYPE service-group SYSTEM "avahi-service.dtd">
<service-group>
      <name replace-wildcards="yes">TimeCapsule %h</name>
      <service>
          <type>_afpovertcp._tcp</type>
          <port>548</port>
      </service>
      <service>
          <type>_device-info._tcp</type>
          <port>0</port>
          <txt-record>model=TimeCapsule</txt-record>
      </service>
</service-group>
After this is configured for your desired settings. Go run your demons:
pi@raspberrypi ~ $ sudo /etc/init.d/netatalk start
pi@raspberrypi ~ $ sudo /etc/init.d/avahi-daemon start
Avahi demon was installed from package. So you might need to actually run
restart instead of
start command. Now go check your Mac's Network Shares.
7. Put avahi and netatalk demons into autolaunch on system boot
We have installed here an avahi demon from package. So it must be
written to all system run-levels during installation. Only thing here is
compiled Netatalk 3.0 so you can make a proper trick here by putting it
to run with default init.d command:
pi@raspberrypi ~ $ cd /etc/init.d/
pi@raspberrypi ~ $ sudo update-rc.d netatalk defaults
update-rc.d: using dependency based boot sequencing
update-rc.d: warning: default stop runlevel arguments (0 1 6) do not match netatalk Default-Stop values (1)
pi@raspberrypi /etc/init.d $

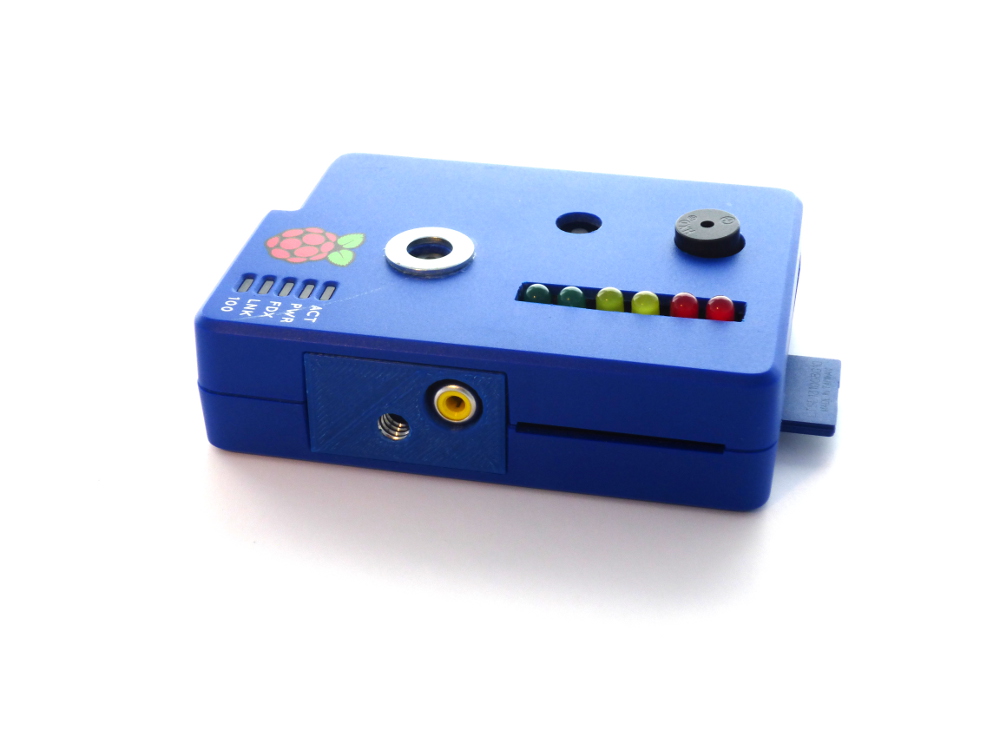
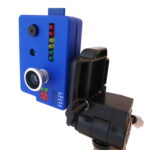
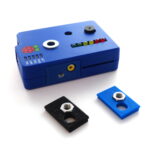
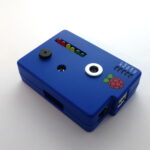
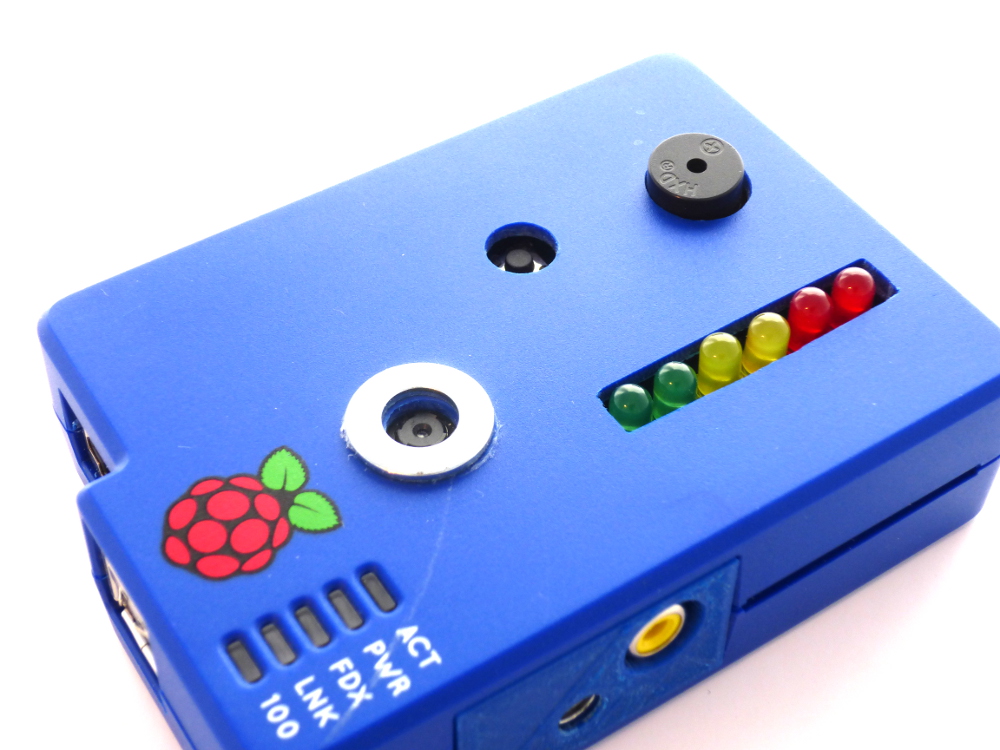
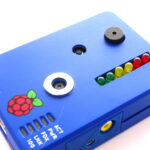 I needed 1 switch and 1 LED so used an already assembled BerryClip add-on board.
This was a quick way of giving me an LED and Switch without me needing
to do any additional wiring. You can easily complete this project with
your own LED, switch and resistors wired up to the appropriate GPIO
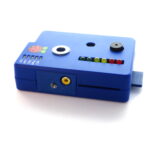
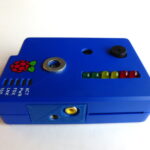
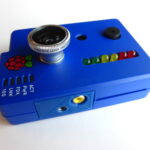
pins. In order to fit everything in the case I need to drill holes to
accommodate the LEDs, buzzer and camera. The switch was recessed but
still usable.
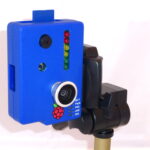
I needed 1 switch and 1 LED so used an already assembled BerryClip add-on board.
This was a quick way of giving me an LED and Switch without me needing
to do any additional wiring. You can easily complete this project with
your own LED, switch and resistors wired up to the appropriate GPIO
pins. In order to fit everything in the case I need to drill holes to
accommodate the LEDs, buzzer and camera. The switch was recessed but
still usable.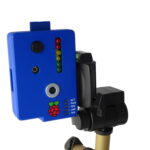
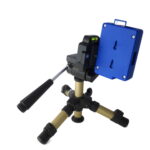

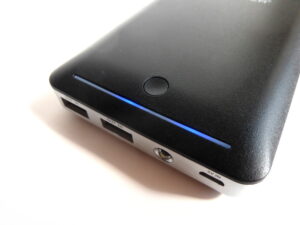 Power
Power

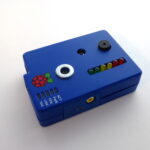

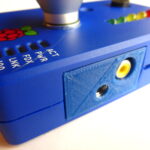
 Shutdown
your Pi and remove the power. Disconnect your network cable. Reconnect
the power and boot the Pi. The Pi will boot and you will hear the buzzer
sound once. The camera is now recording!
Shutdown
your Pi and remove the power. Disconnect your network cable. Reconnect
the power and boot the Pi. The Pi will boot and you will hear the buzzer
sound once. The camera is now recording!


