http://www.raspberrypi-spy.co.uk/2014/11/how-to-create-a-raspberry-pi-video-capture-unit-part-1/
https://bitbucket.org/MattHawkinsUK/rpispy-video-capture-unit
License for copying
-

This work by Matt Hawkins is licensed under a Creative Commons Attribution-NonCommercial 3.0 Unported License
How To Create A Raspberry Pi Video Capture Unit – Part 1
I wanted a standard setup I could quickly deploy around the house, garden, car or bike. The software needed to be easy to setup so I could use it at short notice. I also wanted it to be basic enough that someone else could use it as a basis for their own Pi camera projects.
This sort of idea isn’t exactly unusual and there are plenty of Pi based camera projects out there but I wanted something I was happy with and did exactly what I needed without any fancy features. Re-inventing the wheel can be fun despite what other people might tell you!
Requirements
My requirements were something along these lines :- Easy and quick to configure
- Basic Python script that is easy to follow
- Ability to define number and duration of video files to store
- Minimise hardware items
- Minimise wiring, soldering and construction time
- Provide a method to stop recording and correctly shutdown Pi
- Provide a quick method to attach to a tripod
- Provide a method to review footage on a PC
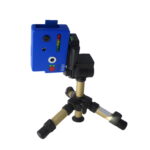
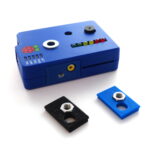
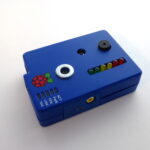
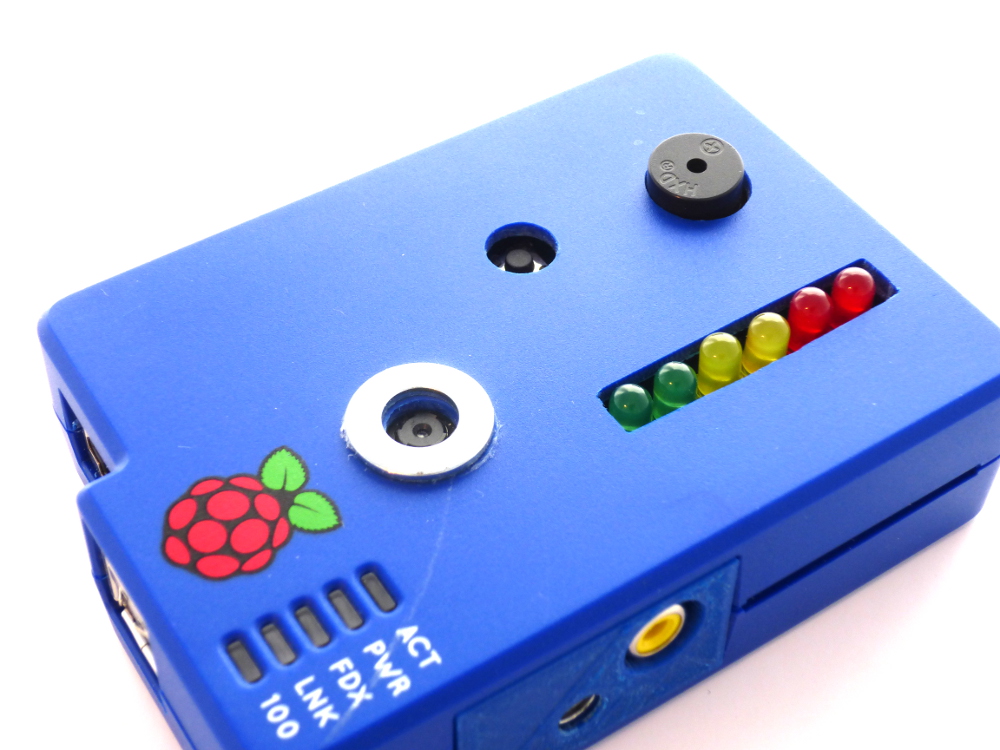
Here is a photo of my finished system :
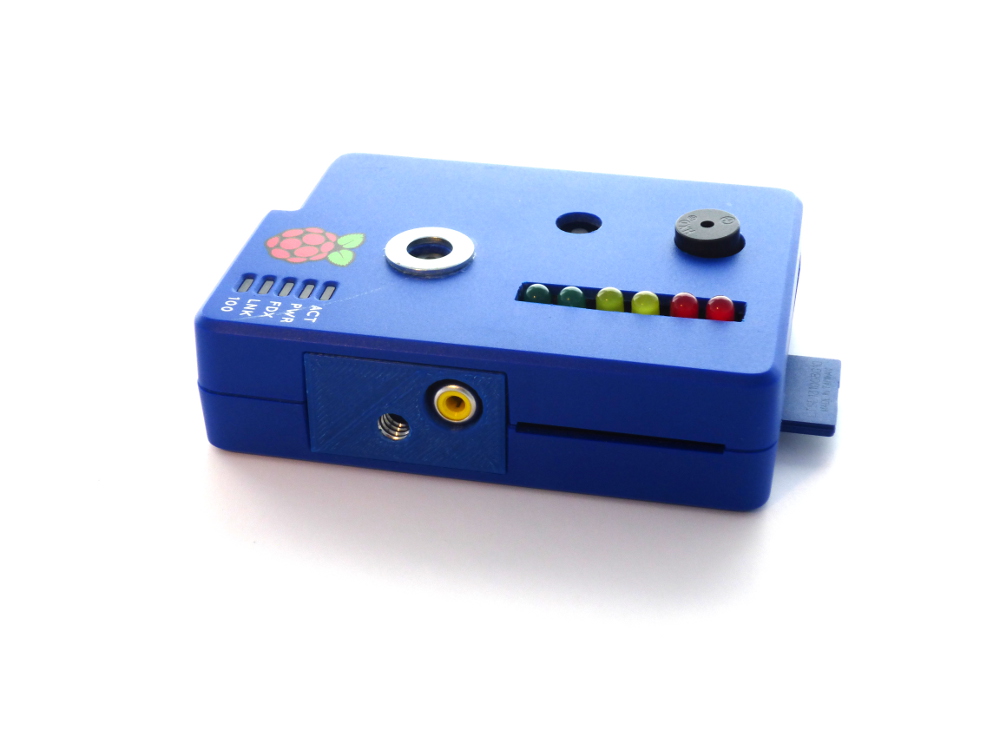
Hardware
The hardware I used is listed below :- Raspberry Pi (Model B)
- Cyntech standard case
- 8GB SanDisk SD card
- 32GB Kingston Flash Drive
- Camera module
- 8mm metal washer
- 3D printed tripod mount
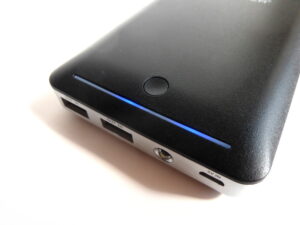
- RAVPower RP-PB13 14000mAh USB power bank
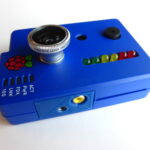
 I needed 1 switch and 1 LED so used an already assembled BerryClip add-on board.
This was a quick way of giving me an LED and Switch without me needing
to do any additional wiring. You can easily complete this project with
your own LED, switch and resistors wired up to the appropriate GPIO
pins. In order to fit everything in the case I need to drill holes to
accommodate the LEDs, buzzer and camera. The switch was recessed but
still usable.
I needed 1 switch and 1 LED so used an already assembled BerryClip add-on board.
This was a quick way of giving me an LED and Switch without me needing
to do any additional wiring. You can easily complete this project with
your own LED, switch and resistors wired up to the appropriate GPIO
pins. In order to fit everything in the case I need to drill holes to
accommodate the LEDs, buzzer and camera. The switch was recessed but
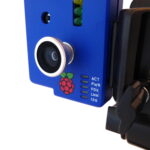
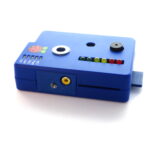
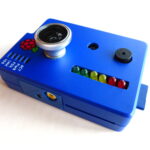
still usable.Sticky pads were used to secure the camera in place. The metal washer was glued in place on the outside to allow cheap magnetic lenses to be attached if required.
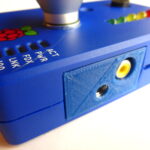
Tripod Mounting
In this project I used the Cyntech case as it is good value, easy to modify and has a nice Raspberry Pi logo on it. My friend Graham 3D printed me a plastic insert which held a metal nut compatible with my tripod. This beautifully simple modification makes the whole unit easy to mount in a fixed position without having to balance it on piles of books.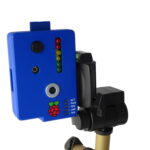
Usage
When the Pi is powered up a cron job is started which looks for a network connection. If there is no network the main Python script is run. I didn’t want the script to start when connected to a network as this is when I wanted to download video without the camera being active.The main script reads the configuration file and starts recording a video file. The files can be saved onto the SD card or a USB flash drive. When the pre-set duration is reached the file is closed and a new one is started. If the total number of video files reaches a pre-set limit then the oldest one is deleted. The device can continue recording over-writing files as required.
The configuration file let’s you set the total number of files to keep, the duration of each file as well as camera properties such as frame rate and resolution.
When you are finished you can hold down the button to quit the script and shutdown the operating system. The power can then be removed.
 Power
Power
Around the house it is easy enough to use mains power but when I want to use the unit on the car or bike I just use my Ravpower RP-PB13 14000mAh USB power bank. I’ve had this battery for a while now and it has been in fairly regular use in my household.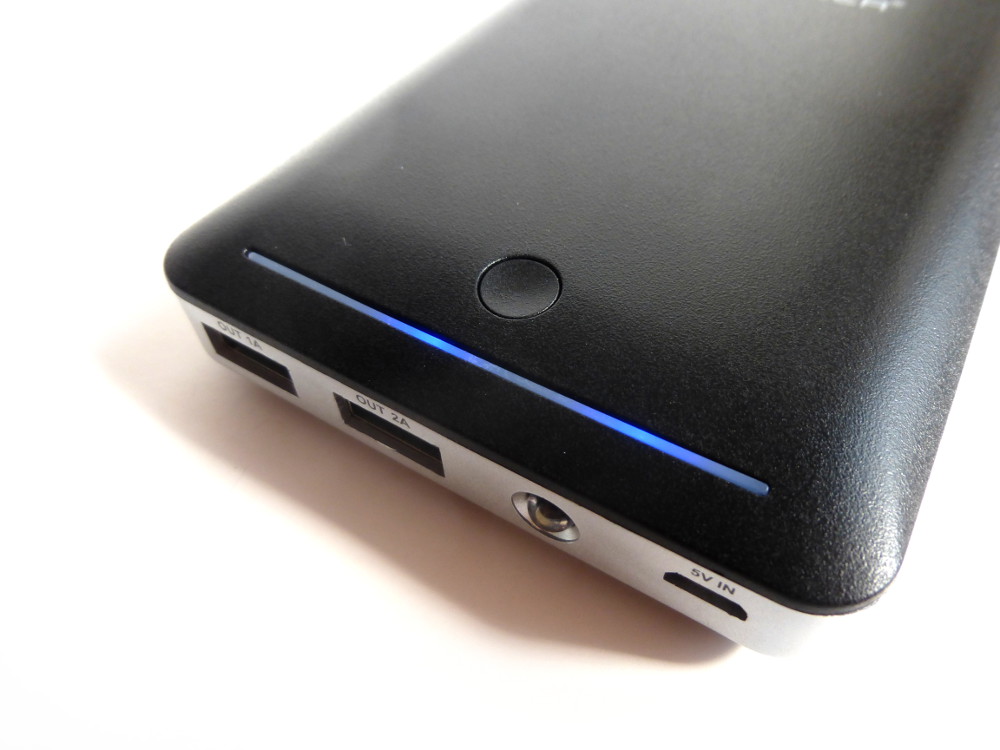
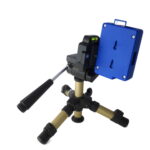
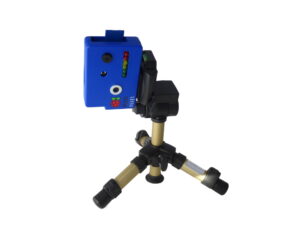
Car Mounting
With a windscreen mount from eBay it’s easy to create a simple dash cam!
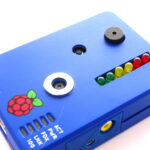
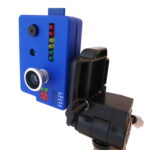
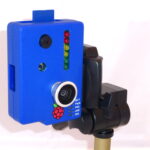
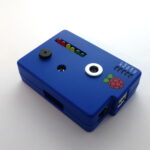
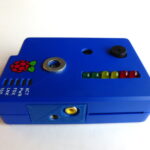
Here are some additional photos :
How To Create A Raspberry Pi Video Capture Unit – Part 2
How To Create A Raspberry Pi Video Capture Unit – Part 2
You don’t need to build your unit in exactly the same way as mine but as a minimum you need :
- Raspberry Pi
- SD card with Raspbian
- Camera module
- 5V power supply
- 1 LED attached to GPIO4 via current limiting resistor (ie 330 ohm)
- 1 Switch attached to GPIO7 with 10K pull-down to ground
- USB Flash Drive (8GB+)
Software
The software is available from the RPiSpy Video Capture Unit BitBucket repository and consists of the following main files :- config.py
- cron.py
- instructions.txt
- prepare_mp4.bat
- prepare_mp4.sh
- vcu.py
This file contain the user defined settings used by vcu.py. It allows the user to adjust various parameters. If “/boot/vcu_config.py” exists it is copied over this config file. The vcu_config.py can be used to edit settings on a Windows PC which can see the /boot/ partition on the SD card.
cron.py
This script is run when the Pi boots. It looks for a network connection and only runs vcu.py if it doesn’t find one. This allows the Pi to boot normally when you have connected it to your network to copy video files.
instructions.txt
Summary of these installation instructions for reference.
prepare_mp4.bat
This script provides an easy way to convert the recorded h264 files to MP4 files. It may take a while to convert depending on the total duration of the videos. It uses MP4Box and is meant to run via Windows.
prepare_mp4.sh
This script provides an easy way to convert the recorded h264 files to MP4 files. It may take a while to convert depending on the total duration of the videos. It uses MP4Box and is meant to run on the Pi itself.
vcu.py
This is the main Python script which does most of the work. It is called from cron.py when the Pi boots.
Installation
First prepare a fresh SD card with Raspbian. Use a recent download from the official RaspberryPi.org site. Why Raspbian? I use it for everything!Power up the Pi and login. You will now be in the home directory. Expand the file system and Enable the Pi Camera using the config tool :
sudo raspi-configEnsure you’ve got the latest firmware using :
sudo rpi-updateCreate a new directory and navigate into it :
mkdir rpispy_vcu
cd rpispy_vcu
Now we can download the archive file from BitBucket using :
wget https://bitbucket.org/MattHawkinsUK/rpispy-video-capture-unit/get/master.tar.gzIf you type ls you should see the master.tar.gz file sitting in the current directory. Use the following command to extract the files from the archive :
tar -xvf master.tar.gz --strip 1Typing ls should show you a list of the files :
You can remove the archive now using :
rm master.tar.gzThe Python scripts control the Raspberry Pi Camera Module using the Picamera module. This is installed by default on the latest version of Raspbian.
Then finally install MP4Box (aka gpac) which can be used to convert the h264 files recorded by the camera to slightly more usable MP4 files :
sudo apt-get -y install gpac
Config File Setup (optional)
If you want to be able to edit the config file in Windows you will need to place a copy in the /boot/ directory. You can do that using :sudo cp config.py /boot/vcu_config.pyWhen the cron.py script runs at boot time it will check if there is a vcu_config.py file in /boot/. If there is it copies it over config.py. The main script would then run and use the new settings.
USB Flash Drive Setup
In order to save our video files to a removable drive we need to get the Pi to automatically mount the USB flash drive. This is a fairly easy process and is described in my How To Mount A USB Flash Disk On The Raspberry Pi tutorial. Follow the tutorial so that your drive is mounted as “/media/usb”.If you don’t want to use a USB flash drive and you want to store videos on your SD card you will need to make a directory :
mkdir ~/rpispy_vcu/videosand set the VIDEO_PATH parameter in the config.py file to point to ‘/home/pi/rpispy_vcu/videos/’. Don’t forget to update /boot/vcu_config.py if you are using that file.
Autorun On Boot Setup
To run the script automatically when the Pi boots you can use ‘cron’. To edit it we use the command :sudo crontab -eUsing your cursor keys scroll to the bottom and add the following line :
@reboot python /home/pi/rpispy_vcu/cron.py &Make sure you get this line correct as the script will fail to run on boot if there are any mistakes. Note that it ends in an ampersand symbol.
To save these changes click “CTRL-X”, then “Y” and finally “Return”. You should now be back at the command prompt.
First Run
 Shutdown
your Pi and remove the power. Disconnect your network cable. Reconnect
the power and boot the Pi. The Pi will boot and you will hear the buzzer
sound once. The camera is now recording!
Shutdown
your Pi and remove the power. Disconnect your network cable. Reconnect
the power and boot the Pi. The Pi will boot and you will hear the buzzer
sound once. The camera is now recording!When you want to stop recording hold down the button until you hear a double beep from the buzzer. The Pi will shutdown. Wait 10 seconds before removing the power cable.
In part 3 I will cover converting the resulting video files into MP4 files which makes them easier to play in a media player or editing application.
How To Create A Raspberry Pi Video Capture Unit – Part 3
How To Create A Raspberry Pi Video Capture Unit – Part 3
In this final part I will explain how I extract the resulting video files from the unit and convert them to MP4 files. This makes them easier to play on other devices and media software.
Converting The Files Directly On The Pi
To convert the files using the Pi you can use the “prepare_mp4.sh” script. Plug the Pi into a network and power it up. We do not want the Pi to start recording video but the main script will not run if a network connection is detected.The script uses MP4Box to do the conversion. If you haven’t installed it previously you can do so using :
sudo apt-get install gpacNow you can navigate to the location where your video files are and check a copy of the script is present. Run the “prepare_mp4.sh” script using :
./prepare_mp4.shIt may take a while but the h264 files in the directory will be converted to MP4. You will need to make sure there is sufficient space available to do this as you will end up with a h264 and MP4 file for each clip.
Once the script has finished you can transfer the resulting video files via SSH or FTP to another computer.
Converting On A Windows PC
My preferred method is to write the video to a USB drive. This can then be plugged into a PC and the “prepare_mp4.bat” script will then convert the h264 files and give you a set of MP4s. In order to use this method you will need to :- Install MP4Box from http://gpac.wp.mines-telecom.fr/downloads/gpac-nightly-builds/
- Create a “d:\temp” temporary directory for the video files
- Insert the USB drive into your PC
- Run (double click) the “prepare_mp4.bat” script
Your video capture unit is now ready for another adventure!
Example Video Footage
Here is a two minute compilation I created from footage I filmed while the camera was attached to my windscreen :The camera resolution was set to 1280×720 although the YouTube video was exported as 1920×1080. The video isn’t very exciting but shows how the camera deals with the varying daytime lighting conditions it comes across.
This entry was posted in Camera Module, Python and tagged berryclip, camera, mp4box, python. Bookmark the permalink.