unzip the install goods
install perl-doc
install openssl (as asked)
export ftp_proxy=
export http_proxy=
run the install.
at the end of the installer you will get this crap, which can hopefully be ignored.
This installer has successfully installed both vSphere CLI and the vSphere SDK
for Perl.
The following Perl modules were found on the system but may be too old to work
with vSphere CLI:
Compress::Zlib 2.037 or newer
Compress::Raw::Zlib 2.037 or newer
version 0.78 or newer
IO::Compress::Base 2.037 or newer
IO::Compress::Zlib::Constants 2.037 or newer
UUID 0.03 or newer
Sunday, May 5, 2013

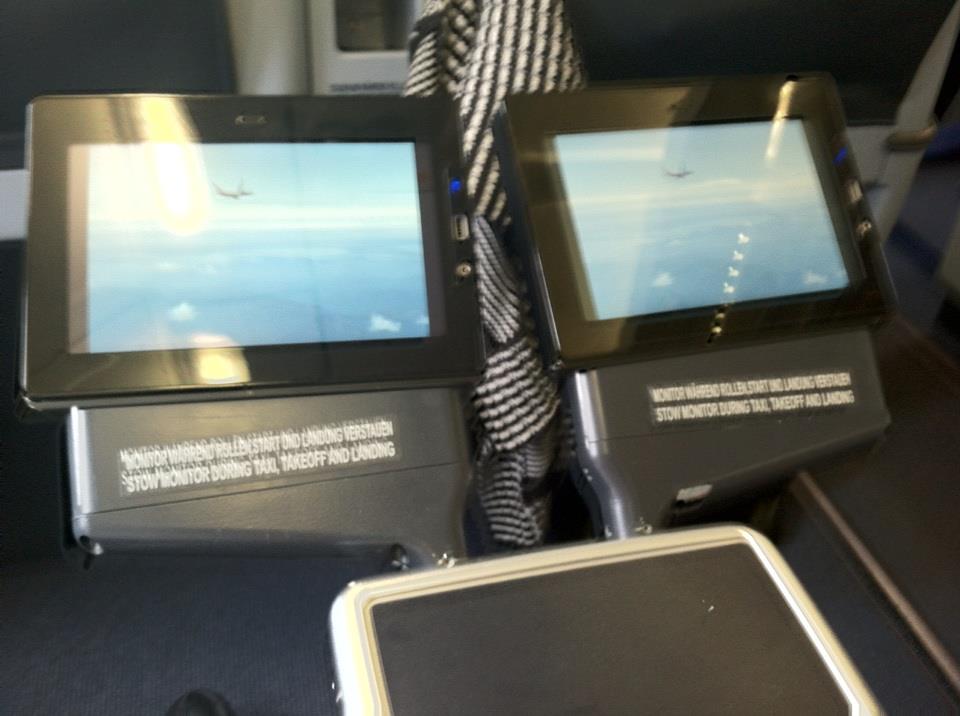
possible Rave sighting in the wild (Air Berlin, ORD-DUS flight)
Jon Sisk posted a photo of the IFE boxes at his seat on an Air Berlin flight today.
Here is a graphic from the Rave page @ IMS's web site

RAVE_Data_Sheet.pdf

I worked on code is in the System Control Unit on the second page. If one turned the reading light Rave, it went thru code in the SCU. The summonsing of the flight attendant,. the muting from the cabin audio came thru the inputs (ARINC-429) and outputs thru the SCU.
The SCU has a Core based SBC with a piggyback 800mhz Freescale ARM system, both running Linux.
Also all media load went from the SCU to the seats. Software loads were via either the Crew Panel unit, or thru the SCU.
Saturday, May 4, 2013
water cooled pi
someone had to do it.
http://www.bit-tech.net/news/hardware/2013/05/01/water-cooled-raspberry-pi-computer-complete/1
 Phame's entry is just one of over a dozen to have been entered into our Raspberry Pi Case contest - voting starts in a few days.
Bit-tech modder Phame aka James Couzens has caused quite a stir in
our forum with what we believe to be the world's first water-cooled
Raspberry Pi.
Having been inspired by our recent Raspberry Pi case contest, James immediately hit on the idea to water-cool this tiny computer and proceeded to create his own water-cooling system for it, complete with miniature pump and waterblock.
The project was completed this week and his project log has notched up nearly 60,000 hits in our forum since it began in mid-February. It's one of over a dozen entries to the competition, which required modders to create their own case for the Raspberry Pi using any material and design.
The Raspberry Pi barely generates any heat, never mind enough to warrant water cooling. However, overkill is something many PC enthusiasts and modders take in their strides and often apply in generous measures.
It doesn't always have to involve obscene amounts of money. Just by doing something because you can, rather than because you should can often lead to interesting results and James' project is the epitome of this.


You can see more of James' project in our forum and both it and the rest of the fantastic entrants will go head to head in the voting stage later this week.
What do you think of James' project? Let us know in the forum.
http://www.bit-tech.net/news/hardware/2013/05/01/water-cooled-raspberry-pi-computer-complete/1
Water-cooled Raspberry Pi computer completed
Phame's entry is just one of over a dozen to have been entered into our Raspberry Pi Case contest - voting starts in a few days.Having been inspired by our recent Raspberry Pi case contest, James immediately hit on the idea to water-cool this tiny computer and proceeded to create his own water-cooling system for it, complete with miniature pump and waterblock.
The project was completed this week and his project log has notched up nearly 60,000 hits in our forum since it began in mid-February. It's one of over a dozen entries to the competition, which required modders to create their own case for the Raspberry Pi using any material and design.
The Raspberry Pi barely generates any heat, never mind enough to warrant water cooling. However, overkill is something many PC enthusiasts and modders take in their strides and often apply in generous measures.
It doesn't always have to involve obscene amounts of money. Just by doing something because you can, rather than because you should can often lead to interesting results and James' project is the epitome of this.
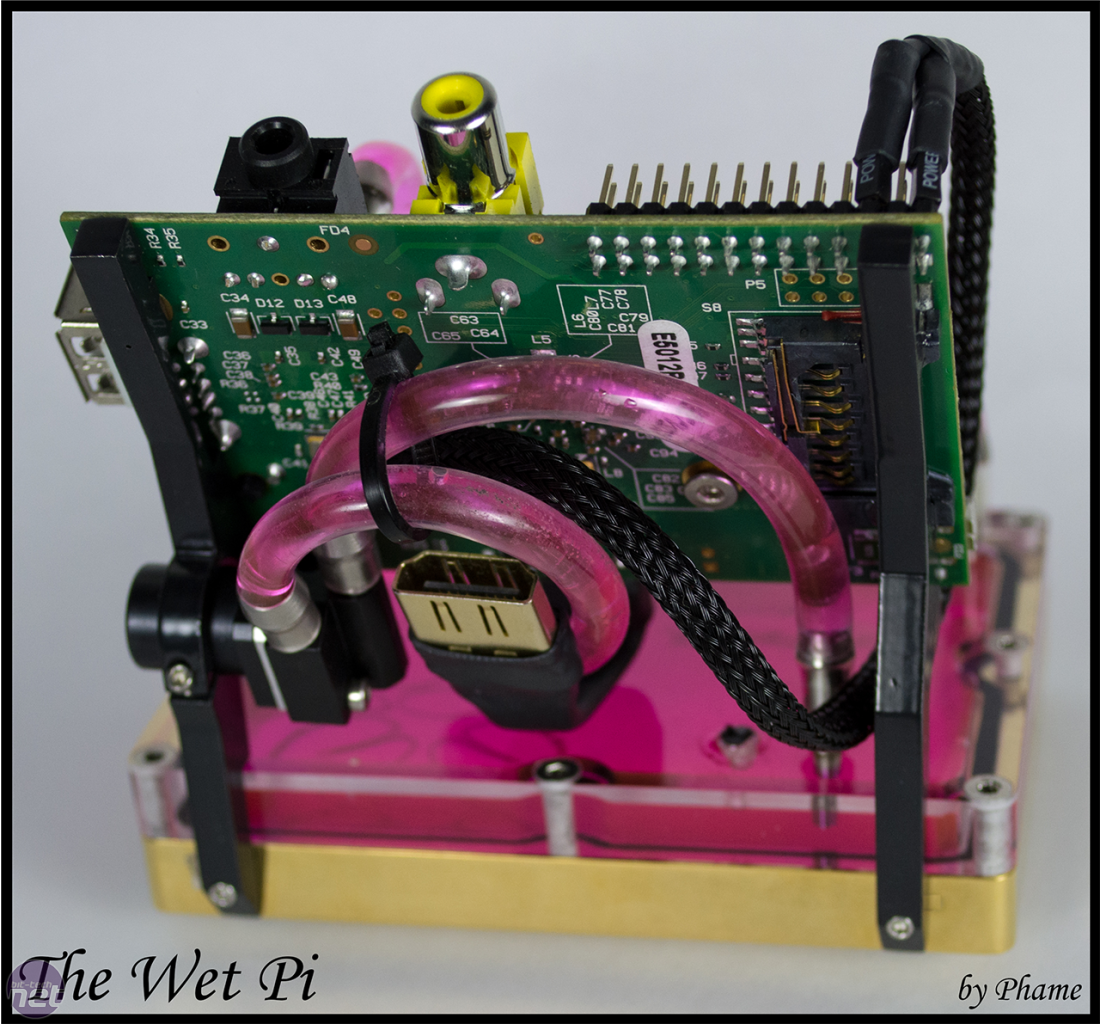
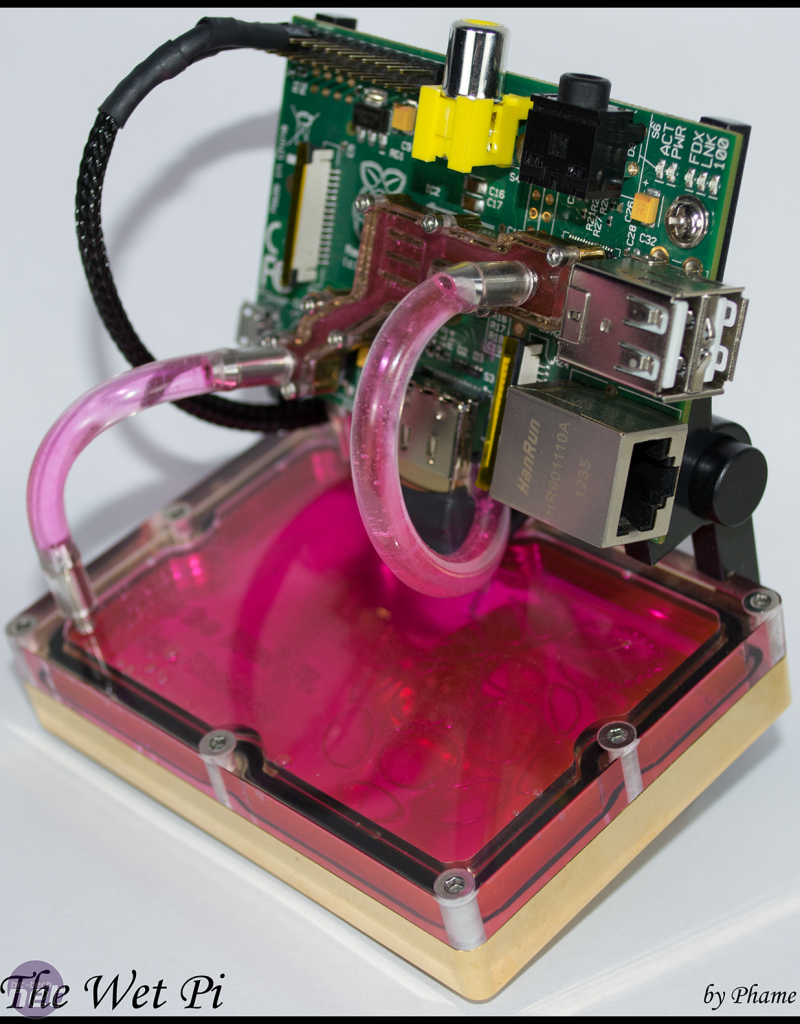
Click to enlarge
You can see more of James' project in our forum and both it and the rest of the fantastic entrants will go head to head in the voting stage later this week.
What do you think of James' project? Let us know in the forum.
Monday, April 29, 2013
google drive on linux
Google has sucked that there is no Linux google drive client or support. I really need something better than what I've got right now.
A search today turned up two links:
grive This didn't work so well last may, and may work better now.
http://www.webupd8.org/2012/05/grive-open-source-google-drive-client.html
Here is a mounter which uses fuse to get to google drive. you have to manually do an rsync, but that isn't really so bad (depending on length of the rsync, etc.).
https://github.com/astrada/google-drive-ocamlfuse
Insync (from the webupd8 mob)
http://www.webupd8.org/2012/10/insync-repository-available-for-ubuntu.html
http://www.webupd8.org/2012/12/linux-google-drive-client-insync-gets.html
I'm installing Insync. here are my notes:
add repo
A search today turned up two links:
grive This didn't work so well last may, and may work better now.
http://www.webupd8.org/2012/05/grive-open-source-google-drive-client.html
Here is a mounter which uses fuse to get to google drive. you have to manually do an rsync, but that isn't really so bad (depending on length of the rsync, etc.).
https://github.com/astrada/google-drive-ocamlfuse
Insync (from the webupd8 mob)
http://www.webupd8.org/2012/10/insync-repository-available-for-ubuntu.html
http://www.webupd8.org/2012/12/linux-google-drive-client-insync-gets.html
I'm installing Insync. here are my notes:
add repo
echo "deb http://apt.insynchq.com/ubuntu $(lsb_release -cs) non-free" | sudo tee /etc/apt/sources.list.d/insync.listget keywget -O- https://d2t3ff60b2tol4.cloudfront.net/services@insynchq.com.gpg.key | sudo apt-key add -update sources sudo apt-get updatesudo apt-get install insync-beta-ubuntusudo add-apt-repository ppa:nilarimogard/webupd8
sudo apt-get updatesudo apt-get -y installthunar
sudo add-apt-repository ppa:nilarimogard/webupd8
sudo apt-get update
sudo apt-get install thunarx-python sudo apt-get install insync-beta-xfce
Friday, April 19, 2013
boot windows 7 / xp etc., from commandline & remotely
pretty much this does it. The remote access seems to make it difficult to do it thru any of the gui or normal methods. Sometimes if you are sneaky with windows xp you can find it, but I think it is hidden if you are using a machine in a domain, which about 1/2 my stuff does.
shutdown -t 0 -r -f
shutdown -t 0 -r -f
Friday, April 5, 2013
VMWARE esxi video memory / size
http://kb.vmware.com/selfservice/microsites/search.do?language=en_US&cmd=displayKC&externalId=1003
how to change the video memory on vmware esxi
Overview
To add additional video resolutions, several changes must be made. Not all changes are required for all products and guests. The changes required are indicated by this article.
The first changes are to the virtual machine itself. Additional video memory must be added to the virtual machine, if required, to support the higher resolutions. The virtual machine must also be edited to supply a larger monitor for the guest operating system to use.
Changes are also required within the guest operating system. The VMware-supplied video driver may need to be adjusted to add the new resolutions, and the new, desired resolution must be set.
Virtual Machine Changes
- Power off the virtual machine.
- Open the .vmx file in a text editor.
- If you are using ESX, you can proceed to step 4.
If you are using a hosted product (Workstation, ACE, Player, Server, or Fusion), add this line so that video memory settings changes made here will be respected by the virtual machine and not overridden by VMware Tools:
svga.autodetect = "FALSE"
Note: If you are using ESX, this value is set by default.
- Calculate the amount of video memory required to support the
highest desired resolution. Multiply the width by the height of the
largest resolution desired, then multiply the result by 4. If the result
exceeds 16777216 (or 4194304 for ESX Server), the video memory must be
increased. Add or update this line in the .vmx file and then append the resulting value of the calculation:
svga.vramSize =
Example: To add the resolution 2560 x 2048 to a Workstation virtual machine, multiply 2560 * 2048 * 4 to get 20971520. This is the amount of memory in bytes required for the resolution. The result, 20971520 bytes, exceeds the default of 16777216 bytes. Therefore, you must add this line to increase the video memory available:
svga.vramSize = 20971520
Notes:- The value must be evenly divisible by 65536 when the guest is running Windows. For more information, see Certain graphical elements are not drawn in a virtual machine running Windows (1001558).
- If the value exceeds the maximum video RAM supported by your hardware version, it is automatically adjusted to the maximum.
- Add or update the maxWidth and maxHeight
values to provide the desired resolution. This value is used to report
the maximum size of the attached virtual monitor to the guest operating
system. Values cannot exceed the resolutions used to calculate the video
memory size in step 3, to ensure that there is enough video memory
available to support the resolution.
svga.maxWidth = 2560
svga.maxHeight = 2048
Note: Certain resolutions are not supported by all guests. Virtual machines running Netware or FreeBSD guest operating systems may not support this resolution change. For more information, see Guest Crashes If Display Settings Specify Too Large a Size on Too Many Monitors (1000229).
- Save the file and open the virtual machine.
Guest Operating System Changes
Note: For Workstation 6.x and higher, and ESX 3.x and higher, the versions of VMware Tools provided by these products are capable of updating the available display resolutions in the guest automatically. If you are using these products and have VMware Tools installed, skip to step 8.
You can modify a Windows guest operating system to support some additional video resolutions, as long as your combination of monitor and video hardware supports them. To do this, edit the Windows registry in the guest operating system after having installed VMware Tools.
Caution: This article contains information about modifying the Windows registry. Before making any registry modifications, ensure that you have a current and valid backup of the registry and the virtual machine. For more information on backing up and restoring the registry, see the Microsoft article 136393.
- Take a full backup of the registry prior to editing it. Do not skip this step.
- Open the Windows Registry editor. Click Start > Run, type regedit, and press Enter.
- The specific registry key will vary by version of Windows. Search (go to Edit > Find) for this key: vmx_svga. The correct key has several sub-keys, but it is the main key that should be edited.
- Create a new string value (REG_SZ) for each new resolution. Name the new value Resolution.x, where x is one higher than the highest number listed. Ensure that you correctly identify the highest number, as the values are not listed in numerical order.
- Modify the data in the new value. Enter the desired resolution using the format WIDTHxHEIGHT. For example, to add a resolution of 1600 x 1024 pixels, enter 1600x1024.
- Repeat steps 4 and 5 for any other desired resolutions.
- Restart the guest operating system.
- Log on as an administrator, and verify that the new resolutions are available:
- Go to Start > Settings > Control Panel > Display > Settings.
- Adjust the Screen Area slider control.
Note: Resolutions that are not supported by the physical monitor and video hardware are not available to be selected.
Additional Information
The previous steps describe how to add video resolutions using string type values. However, the registry keys for existing resolutions in your guest operating system use hexadecimal value keys as REG_BINARY. To view the string equivalent of the resolution, double-click the value. The string representation is displayed on the right side followed by a period.
This table lists string values commonly used in pixel resolutions, and the corresponding hexadecimal value:
| Hexadecimal value | String value (pixels) |
|---|---|
| 36,34,30 | 640 |
| 34,38,30 | 480 |
| 38,30,30 | 800 |
| 36,30,30 | 600 |
| 37,36,38 | 768 |
| 38,36,34 | 864 |
| 39,36,30 | 960 |
| 31,30,32,34 | 1024 |
| 31,30,35,30 | 1050 |
| 31,31,35,32 | 1152 |
| 31,32,38,30 | 1280 |
| 31,34,30,30 | 1400 |
| 31,34,34,30 | 1440 |
| 31,36,30,30 | 1600 |
| 31,32,30,30 | 1200 |
| 31,37,39,32 | 1792 |
| 31,33,34,34 | 1344 |
| 31,38,35,36 | 1856 |
| 31,33,39,32 | 1392 |
| 31,39,32,30 | 1920 |
For older Windows operating systems, see Configuring the SVGA video driver on older versions of Windows virtual machines (1001819).
Subscribe to:
Posts (Atom)