Tuesday, March 3, 2026
Install and enable telnet daemon on Raspberry Pi
Transfer package list from one linux system to new install
Open the terminal on your old machine and enter this command. It creates a list of all packages you manually installed.
apt-mark showmanual > packages.txt
Transfer the packages.txt file to the PC with the new installation. Open a terminal in the that navigate to the folder where you kept the packages.txt file. Then run this command.
sudo xargs apt install -y
Friday, August 20, 2021
Install cockpit on Debian 9, Ubuntu 20.04 (or 18.0x)
captured a bit of info.
Install Cockpit on Ubuntu 20.04/18.04/19.04 & Debian 10/9
Welcome to our guide on How to Install Cockpit on Ubuntu 20.04/18.04/16.04 & Debian 10/9. Linux Cockpit is an Open Source, lightweight, web-based Server/system administration tool originally written for RHEL family Linux distributions. Cockpit interacts directly with the operating system from a real Linux session in a browser with easy to use interface.
Features of Cockpit
Cockpit allows you to perform:
- Service Management – Start, stop, restart, reload, disable, enable, mask e.t.c
- User Account Management – Add users, delete, Lock, assign Administrator role, set password, force password change, Add Public SSH keys e.t.c.
- Firewall Management
- Cockpit Container management
- SELinux Policy management
- Journal v2
- iSCSI Initiator configurations
- SOS-reporting
- NFS Client setup
- Configure OpenConnect VPN Server
- Privileged Actions – Shutdown, Restart system
- Join Machine to Domain
- Hardware Device Management
- System Updates for dnf, yum, apt hosts
- Manage the Kubernetes Node
Install Cockpit on Ubuntu 20.04/18.04
Cockpit is available on Ubuntu official repositories. The installation is as simple as running a one-liner set of commands:
sudo apt update
sudo apt install cockpitInstall Cockpit on Debian 10 / Debian 9
Install Cockpit on Debian 10:
sudo apt update
sudo apt install cockpitInstall Cockpit on Debian 9:
Cockpit is included in Debian 9 (Stretch) backports. Enable backports repository on Debian 9 by running the command:
echo 'deb http://deb.debian.org/debian stretch-backports main' | sudo tee /etc/apt/sources.list.d/backports.listThen update your package list and install cockpit:
sudo apt update
sudo apt install cockpitAccessing cockpit web interface
Cockpit service should be automatically started after the installation. You can confirm if service is running using:
$ systemctl status cockpitIf the service is not running, start it by running the following command in your terminal:
sudo systemctl start cockpitCockpit service binds to port 9090 once it is started. Access its web interface by opening http://[ServerIP|Hostname]:9090.
If you have a running UFW firewall service, allow port 9090.
sudo ufw allow 9090Ignore Invalid Certificate Warning.
Ubuntu Login Page:
--30--
Thursday, August 19, 2021
install xrdp for remote desktop on friendlyarm ubuntu version, focal 20.04.
How to setup XRDP server on NanoPC-T4
Contents
1 Step1: Install XRDP remote desktop
Enter the following command to install:
sudo apt install -y tigervnc-standalone-server xrdp sudo sed -e 's/^new_cursors=true/new_cursors=false/g' -i / etc / xrdp / xrdp.ini
2 Step2: Edit /etc/xrdp/startwm.sh
Edit /etc/xrdp/startwm.sh:
sudo vim / etc / xrdp / startwm.sh
Comment out the last two lines in the file (comment method: add # sign at the beginning of the line), as shown below:
# test -x /etc/X11/Xsession && exec /etc/X11/Xsession # exec /bin/sh /etc/X11/Xsession
Then add the following at the end of the file:
lxsession -s LXDE -e LXDE
3 Step3: Edit /etc/xrdp/xrdp.ini
Edit /etc/xrdp/xrdp.ini
sudo vim / etc / xrdp / xrdp.ini
Scroll to the address of "; Session types", delete all other session types, only [Xvnc] is left:
; ; Session types ; ; Some session types such as Xorg, X11rdp and Xvnc start a display server. ; Startup command-line parameters for the display server are configured ; in sesman.ini. See and configure also sesman.ini. [ Xvnc ] name =Xvnc lib =libvnc.so username =ask password =ask ip =127.0.0.1 port =- 1 #xserverbpp=24 #delay_ms=2000
4 Step4: Disable light-locker
Since light-locker will not work properly in the XRDP environment, we need to disable it in the XRDP environment. In order not to affect the real environment, here we use a packaging script to solve the problem. First, rename the original file:
the sudo CP / usr / bin / Light-Locker / usr / bin / Light-locker.orig the sudo RM / usr / bin / Light-Locker
Create another script to call it, and use the editor to create a file /usr/bin/light-locker with the following content:
#!/bin/sh # The light-locker uses XDG_SESSION_PATH provided by lightdm. if [ ! -Z " \$ {XDG_SESSION_PATH}" ] ; then / usr / bin / light-locker.orig else # Disable light-locker in XRDP. true fi EOF
Give the script executable permissions:
sudo chmod 755 / usr / bin / light-locker
5 Step5: Start xrdp service
sudo systemctl enable xrdp sudo systemctl restart xrdp
6 Step6: Test the remote desktop connection
Use the Microsoft Remote Desktop client to create a new connection, the address is the IP address of the development board, and the user name and password are pi. In order to get a better experience, the resolution is recommended to be set to 1280x800, and the color depth is 24 bits. The settings are as shown in the figure below. Shown:
After the connection is successful, as shown in the figure below:
Friday, May 21, 2021
how to create a local repository for Debian. Also redirect from local to remote repo
Thursday, September 26, 2019
shell in a box centos 8
still not found in epel release
help on this page
https://www.centos.org/forums/viewtopic.php?t=61994
--30--
Tuesday, July 30, 2019
rpi-monitor install
RPI monitor page (installation)
https://xavierberger.github.io/RPi-Monitor-docs/11_installation.html
To use this repository follow the instruction bellow:
Install RPi-Monitor‘s public key to trust RPi-Monitor repository:
sudo apt-get install dirmngr
sudo apt-key adv --recv-keys --keyserver keyserver.ubuntu.com 2C0D3C0F
sudo wget http://goo.gl/vewCLL -O /etc/apt/sources.list.d/rpimonitor.list
sudo apt-get update
sudo apt-get install rpimonitor
script:
#!/bin/bash
sudo apt-get install dirmngr
sudo apt-key adv --recv-keys --keyserver keyserver.ubuntu.com 2C0D3C0F
sudo wget http://goo.gl/vewCLL -O /etc/apt/sources.list.d/rpimonitor.list
sudo apt-get update
sudo apt-get -y install rpimonitor
echo "access monitor via http://`hostname`:8888"
****************
debugging notes
Use USR1 and USR2 to increment log level for code
sudo killall -USR1 rpimonitord
perl code is @ /usr/bin/rpimonitord.pl
other goods are at /usr/share/rpimonitor
the web sub directory contains js and img directories for the web side of the application.
HTML5 is used for the web browser side.
-30-
Sunday, July 7, 2019
qemu and kvm server install
https://www.cyberciti.biz/faq/install-kvm-server-debian-linux-9-headless-server/
Step 1: Install kvm
Type the following apt-get command/apt command:$
sudo apt install qemu-kvm libvirt-clients libvirt-daemon-system
bridge-utils libguestfs-tools genisoimage virtinst libosinfo-binIf you want normal/regular user can manage virtual machines. Add user vivek to libvirt and libvirt-qemu using usermod command:
$ sudo adduser vivek libvirt
$ sudo adduser vivek libvirt-qemuReload group membership with the help of newgrp command:
$ newgrp libvirt
$ newgrp libvirt-qemuVerify your group membership with id command:
$ idPlease note that you need to use the following command to connect to KVM server:
$ virsh --connect qemu:///system
$ virsh --connect qemu:///system command
$ virsh --connect qemu:///system list --allStep 3: Configure bridged networking on Debian
I am going to create bridge Interface br0 as the network connection in VM guests configuration for eth0 interface:$ sudo vi /etc/network/interfaces.d/br0Append the following:
## make sure all config related to eth0 deleted ##
auto br0
iface br0 inet static
address 192.168.2.23 ## set up/netmask/broadcast/gateway as per your setup
broadcast 192.168.2.255
netmask 255.255.255.0
gateway 192.168.2.254
bridge_ports eth0 # replace eth0 with your actual interface name
bridge_stp off # disable Spanning Tree Protocol
bridge_waitport 0 # no delay before a port becomes available
bridge_fd 0 # no forwarding delay
Restart the networking service on Linux:
$ sudo systemctl restart network-managerTo see current networking setting for KVM, run:
$ sudo virsh net-list --all You need to configure a KVM guest domain on a bridged network. So create a file named bridge.xml as follows a text editor such as NA command:
$ sudo vi /root/bridged.xmlAppend the following config:
<network> <name>br0</name> <forward mode="bridge"/> <bridge name="br0"/> </network> |
$ sudo virsh net-define --file /root/bridged.xml
$ sudo virsh net-autostart br0
$ sudo virsh net-start br0Create CentOS 7 VM
In this example, I’m creating CentOS 7.x VM with 2GB RAM, 2 CPU core, 1 nic and 40GB disk space, enter:$ sudo virt-install \
--virt-type=kvm \
--name centos7 \
--ram 2048 \
--vcpus=2 \
--os-variant=rhel7 \
--virt-type=kvm \
--hvm \
--cdrom=/var/lib/libvirt/boot/CentOS-7-x86_64-DVD-1708.iso \
--network=bridge=br0,model=virtio \
--graphics vnc \
--disk path=/var/lib/libvirt/images/centos7.qcow2,size=40,bus=virtio,format=qcow2To configure vnc login from another terminal over ssh and type:
$ sudo virsh dumpxml centos7 | grep vnc
<graphics type='vnc' port='5901' autoport='yes' listen='127.0.0.1'>You can also use the following command:
$ sudo virsh vncdisplay centos7Please note down the port value (i.e. 5901). You need to use an SSH client to setup tunnel and a VNC client to access the remote vnc server. Type the following SSH port forwarding command from your client/desktop:
$ ssh vivek@server1.cyberciti.biz -L 5901:127.0.0.1:5901Once you have ssh tunnel established, you can point your VNC client at your own 127.0.0.1 (localhost) address and port 5901 as follows:
Step 5 – Use virt-builder to create VM
Above method (virt-install) works nicely but if you need quickly building new virtual machines, try virt-builder.How to list the virtual machines available
$ virt-builder --list | moreYou can use the grep command to filter out only x86_64 arch based VMs:
$ virt-builder --list | grep x86_64Create Debian 9.x VM
Create Debian 9 VM with 10GB disk space, 2GB ram, 2 vCPU and random password for root account, run:$ sudo virt-builder debian-9 \
--size=10G \
--format qcow2 -o /var/lib/libvirt/images/debian9-vm1.qcow2 \
--hostname debain9-vm1 \
--network \
--timezone Asia/KolkataFinally import image with virt-install command:
$ sudo virt-install --import --name debian9-vm1 \
--ram 2048 \
--vcpu 2 \
--disk path=/var/lib/libvirt/images/debian9-vm1.qcow2,format=qcow2 \
--os-variant debian9 \
--network=bridge=br0,model=virtio \
--noautoconsoleYou can login to your VM using x0E4iZ8sHjA6ekb6 password for root account:
$ sudo virsh list --all
$ virsh console debian9-vm1 --30--
Saturday, April 13, 2019
jenkins notes
installing jenkins
how-to-install-jenkins-on-ubuntu-18-04
changing jenkins port
how-to-change-port-for-jenkins
/etc/default/jenkins has port number. Also change it in the URL settings for programs which
want to access jenkins for whatever reason.
shutting down jenkins
http://jenkins-server/exit
jenkins general admin
Administering+Jenkins
starting jenkins
Starting+and+Accessing+Jenkins
--30--
Sunday, February 3, 2019
DC calculator for Ubuntu install
RPN Desk Calculator for Unix / Linux
Ubuntu 16.04 info
https://ubuntu.pkgs.org/16.04/ubuntu-main-amd64/dc_1.06.95-9build1_amd64.deb.html
http://www.zoomadmin.com/HowToInstall/UbuntuPackage/dc
/usr/bin/dc
/usr/share/doc-base/dc
- Update the package index:
# sudo apt-get update - Install dc deb package:
# sudo apt-get install dc
--30--
Sunday, January 20, 2019
configuration notes for beaglebone pocket
local link to BBB if connected (presented for convenience).
http://192.168.7.2/bone101/Support/bone101/
This will probably apply to the beaglebone black (wireless) which will be used in the Unibone project that is in the queue.
This has some number of extra complications since it has a USB OTG connection for power and also presents a USB networking adapter via that conduit to the host.
This allows for a very interesting control interface via the web, but makes it a bit tricky to
get to the internet with the pocket (since it has no network NIC).
The first few notes here are for configuring the network, setting up ssh.
The default login is debian for the system, which is default for the debian releases.
The network router / gateway address is 192.168.7.1, and 192.168.7.2 is the IP for the debian board on the other side of the USB. On windows at least, the win 10 automagically recognized the connection, created an eth instance for the USB NDIS nic and the ip 192.168.7.1 is visible there.
Login worked to the 192.168.7.2 as advertised.
The time page below doesn't use Debian, so such as installing software must be translated to debian commands. The page's example uses Angstrom (which is advertised on the BBB images).
Also it did not include the incantation for getting the time to be set. ntp was not in the downloaded debian image used, so one must use some way to get the time to set.
http://derekmolloy.ie/automatically-setting-the-beaglebone-black-time-using-ntp/
I also wanted to set the timezone. Not sure how one would do it on the Angstrom release, but on debian, the dpkg reconfigure worked as usual.
dpkg-reconfigure tzdata
This page has info for making Windows 7 host the network connection.
https://ofitselfso.com/BeagleNotes/HowToConnectBeagleboneBlackToTheInternetViaUSB.php
Will research how to use a raspberry pi W or such linux system to host this, with possibly less foolishness with the network setup on the hosting system end. With windows not sure how much has to be redone everytime the system starts and stops.
Also since this will be frequently used on a windows laptop, not sure whether the whole thing will survive suspend, even if the BBB pocket is turned off prior to the exercise of suspending.
Eventually setting up a raspberry pi zero as a router would be valuable as it could also present an IP and make it accessible by natting the connection used by the BBB.
***********************
Hosting system + network with a linux host:
https://elementztechblog.wordpress.com/2014/12/22/sharing-internet-using-network-over-usb-in-beaglebone-black/
The Debian OS is used for the testing which is obtained from here.
BBB console can be obtained by using the following command
ssh 192.168.7.2 -l root
In the BBB console type the followingifconfig usb0 192.168.7.2
route add default gw 192.168.7.1
In the linux console of host system type
sudo su
#wlan0 is my internet facing interface, eth5 is the BeagleBone USB connection
ifconfig eth5 192.168.7.1
iptables --table nat --append POSTROUTING --out-interface wlan0 -j MASQUERADE
iptables --append FORWARD --in-interface eth5 -j ACCEPT
echo 1 > /proc/sys/net/ipv4/ip_forward
Incase network not accessible then type the following in BBB terminalecho "nameserver 8.8.8.8" >> /etc/resolv.conf
To set up a domain use the following (example uses pri domain):
domain pri
search pri
nameserver 10.192.168.1
nameserver 8.8.8.8
***********************
Other links of use:
getting started
How to Connect a BeagleBone Black to the Internet Using USB
discussion for Armbian, but some good info on USB OTG as a tether.
USB OTG as a network - Development - Armbian forum
Announcing $25 PocketBeagle - Google Groups (link into GG discussions)
BeagleBoard.org - latest-images
eLinux org links
BeagleBoardDebian - eLinux.org
--30--
Tuesday, January 8, 2019
Installation log for raspberry pi monitoring RPI-monitor
log from installing rpi monitor
pi@raspberrypi2:~ $ sudo su
root@raspberrypi2:/home/pi# apt-get -y install dirmngr
Reading package lists... Done
Building dependency tree
Reading state information... Done
The following additional packages will be installed:
gnupg gnupg-agent
Suggested packages:
pinentry-gnome3 tor parcimonie xloadimage scdaemon
Recommended packages:
gnupg-l10n
The following NEW packages will be installed:
dirmngr
The following packages will be upgraded:
gnupg gnupg-agent
2 upgraded, 1 newly installed, 0 to remove and 313 not upgraded.
Need to get 2,068 kB of archives.
After this operation, 968 kB of additional disk space will be used.
Get:1 http://mirror.os6.org/raspbian/raspbian stretch/main armhf gnupg-agent armhf 2.1.18-8~deb9u3 [499 kB]
Get:2 http://mirror.os6.org/raspbian/raspbian stretch/main armhf gnupg armhf 2.1.18-8~deb9u3 [1,022 kB]
Get:3 http://mirror.os6.org/raspbian/raspbian stretch/main armhf dirmngr armhf 2.1.18-8~deb9u3 [547 kB]
Fetched 2,068 kB in 3s (570 kB/s)
apt-listchanges: Reading changelogs...
(Reading database ... 123891 files and directories currently installed.)
Preparing to unpack .../gnupg-agent_2.1.18-8~deb9u3_armhf.deb ...
Unpacking gnupg-agent (2.1.18-8~deb9u3) over (2.1.18-8~deb9u1) ...
Setting up gnupg-agent (2.1.18-8~deb9u3) ...
(Reading database ... 123891 files and directories currently installed.)
Preparing to unpack .../gnupg_2.1.18-8~deb9u3_armhf.deb ...
Unpacking gnupg (2.1.18-8~deb9u3) over (2.1.18-8~deb9u1) ...
Setting up gnupg (2.1.18-8~deb9u3) ...
Selecting previously unselected package dirmngr.
(Reading database ... 123891 files and directories currently installed.)
Preparing to unpack .../dirmngr_2.1.18-8~deb9u3_armhf.deb ...
Unpacking dirmngr (2.1.18-8~deb9u3) ...
Processing triggers for install-info (6.3.0.dfsg.1-1+b1) ...
Processing triggers for man-db (2.7.6.1-2) ...
Setting up dirmngr (2.1.18-8~deb9u3) ...
root@raspberrypi2:/home/pi# sudo apt-key adv --recv-keys --keyserver keyserver.ubuntu.com 2C0D3C0F
Executing: /tmp/apt-key-gpghome.C0qYeR41mJ/gpg.1.sh --recv-keys --keyserver keyserver.ubuntu.com 2C0D3C0F
gpg: key E4E362DE2C0D3C0F: public key "Xavier Berger <berger.xavier@gmail.com>" imported
gpg: Total number processed: 1
gpg: imported: 1
root@raspberrypi2:/home/pi# sudo wget http://goo.gl/vewCLL -O /etc/apt/sources.list.d/rpimonitor.list
--2019-01-08 12:16:05-- http://goo.gl/vewCLL
Resolving goo.gl (goo.gl)... 216.58.193.206, 2607:f8b0:4007:80b::200e
Connecting to goo.gl (goo.gl)|216.58.193.206|:80... connected.
HTTP request sent, awaiting response... 301 Moved Permanently
Location: https://raw.githubusercontent.com/XavierBerger/RPi-Monitor/master/src/etc/apt/sources.list.d/rpimonitor.list [following]
--2019-01-08 12:16:05-- https://raw.githubusercontent.com/XavierBerger/RPi-Monitor/master/src/etc/apt/sources.list.d/rpimonitor.list
Resolving raw.githubusercontent.com (raw.githubusercontent.com)... 151.101.196.133
Connecting to raw.githubusercontent.com (raw.githubusercontent.com)|151.101.196.133|:443... connected.
HTTP request sent, awaiting response... 200 OK
Length: 73 [text/plain]
Saving to: ‘/etc/apt/sources.list.d/rpimonitor.list’
/etc/apt/sources.li 100%[===================>] 73 --.-KB/s in 0s
2019-01-08 12:16:06 (4.97 MB/s) - ‘/etc/apt/sources.list.d/rpimonitor.list’ saved [73/73]
root@raspberrypi2:/home/pi# sudo apt-get update
Get:1 http://mirrordirector.raspbian.org/raspbian stretch InRelease [15.0 kB]
Hit:2 http://archive.raspberrypi.org/debian stretch InRelease
Ign:3 http://giteduberger.fr rpimonitor/ InRelease
Get:4 http://giteduberger.fr rpimonitor/ Release [1,396 B]
Get:5 http://giteduberger.fr rpimonitor/ Release.gpg [455 B]
Get:6 http://giteduberger.fr rpimonitor/ Packages [359 B]
Fetched 17.2 kB in 4s (4,096 B/s)
Reading package lists... Done
root@raspberrypi2:/home/pi# sudo apt-get install rpimonitor
Reading package lists... Done
Building dependency tree
Reading state information... Done
The following additional packages will be installed:
libcommon-sense-perl libdbi1 libencode-locale-perl libfile-which-perl
libhttp-daemon-perl libhttp-date-perl libhttp-message-perl libio-html-perl
libipc-sharelite-perl libjson-perl libjson-xs-perl liblwp-mediatypes-perl
librrd8 librrds-perl libtimedate-perl libtypes-serialiser-perl liburi-perl
Suggested packages:
libwww-perl
The following NEW packages will be installed:
libcommon-sense-perl libdbi1 libencode-locale-perl libfile-which-perl
libhttp-daemon-perl libhttp-date-perl libhttp-message-perl libio-html-perl
libipc-sharelite-perl libjson-perl libjson-xs-perl liblwp-mediatypes-perl
librrd8 librrds-perl libtimedate-perl libtypes-serialiser-perl liburi-perl
rpimonitor
0 upgraded, 18 newly installed, 0 to remove and 313 not upgraded.
Need to get 1,385 kB of archives.
After this operation, 2,188 kB of additional disk space will be used.
Do you want to continue? [Y/n] y
Get:1 http://giteduberger.fr rpimonitor/ rpimonitor 2.12-r0 [469 kB]
Get:2 http://mirror.os6.org/raspbian/raspbian stretch/main armhf libcommon-sense-perl armhf 3.74-2 [23.6 kB]
Get:3 http://mirror.os6.org/raspbian/raspbian stretch/main armhf libdbi1 armhf 0.9.0-4+deb9u1 [27.1 kB]
Get:4 http://mirror.os6.org/raspbian/raspbian stretch/main armhf libencode-locale-perl all 1.05-1 [13.7 kB]
Get:5 http://mirror.os6.org/raspbian/raspbian stretch/main armhf libfile-which-perl all 1.21-1 [14.3 kB]
Get:6 http://mirror.os6.org/raspbian/raspbian stretch/main armhf libtimedate-perl all 2.3000-2 [42.2 kB]
Get:7 http://mirror.os6.org/raspbian/raspbian stretch/main armhf libhttp-date-perl all 6.02-1 [10.7 kB]
Get:8 http://mirror.os6.org/raspbian/raspbian stretch/main armhf libio-html-perl all 1.001-1 [17.6 kB]
Get:9 http://mirror.os6.org/raspbian/raspbian stretch/main armhf liblwp-mediatypes-perl all 6.02-1 [22.1 kB]
Get:10 http://mirror.os6.org/raspbian/raspbian stretch/main armhf liburi-perl all 1.71-1 [88.6 kB]
Get:11 http://mirror.os6.org/raspbian/raspbian stretch/main armhf libhttp-message-perl all 6.11-1 [75.9 kB]
Get:12 http://mirror.os6.org/raspbian/raspbian stretch/main armhf libhttp-daemon-perl all 6.01-1 [17.3 kB]
Get:14 http://mirror.os6.org/raspbian/raspbian stretch/main armhf libjson-perl all 2.90-1 [86.0 kB]
Get:13 http://raspbian-us.ngc292.space/raspbian stretch/main armhf libipc-sharelite-perl armhf 0.17-4 [23.0 kB]
Get:15 http://mirror.os6.org/raspbian/raspbian stretch/main armhf libtypes-serialiser-perl all 1.0-1 [12.7 kB]
Get:16 http://mirror.os6.org/raspbian/raspbian stretch/main armhf libjson-xs-perl armhf 3.030-1 [90.0 kB]
Get:17 http://mirror.os6.org/raspbian/raspbian stretch/main armhf librrd8 armhf 1.6.0-1+b1 [227 kB]
Get:18 http://raspbian-us.ngc292.space/raspbian stretch/main armhf librrds-perl armhf 1.6.0-1+b1 [124 kB]
Fetched 1,385 kB in 8s (162 kB/s)
Selecting previously unselected package libcommon-sense-perl.
(Reading database ... 123910 files and directories currently installed.)
Preparing to unpack .../00-libcommon-sense-perl_3.74-2_armhf.deb ...
Unpacking libcommon-sense-perl (3.74-2) ...
Selecting previously unselected package libdbi1:armhf.
Preparing to unpack .../01-libdbi1_0.9.0-4+deb9u1_armhf.deb ...
Unpacking libdbi1:armhf (0.9.0-4+deb9u1) ...
Selecting previously unselected package libencode-locale-perl.
Preparing to unpack .../02-libencode-locale-perl_1.05-1_all.deb ...
Unpacking libencode-locale-perl (1.05-1) ...
Selecting previously unselected package libfile-which-perl.
Preparing to unpack .../03-libfile-which-perl_1.21-1_all.deb ...
Unpacking libfile-which-perl (1.21-1) ...
Selecting previously unselected package libtimedate-perl.
Preparing to unpack .../04-libtimedate-perl_2.3000-2_all.deb ...
Unpacking libtimedate-perl (2.3000-2) ...
Selecting previously unselected package libhttp-date-perl.
Preparing to unpack .../05-libhttp-date-perl_6.02-1_all.deb ...
Unpacking libhttp-date-perl (6.02-1) ...
Selecting previously unselected package libio-html-perl.
Preparing to unpack .../06-libio-html-perl_1.001-1_all.deb ...
Unpacking libio-html-perl (1.001-1) ...
Selecting previously unselected package liblwp-mediatypes-perl.
Preparing to unpack .../07-liblwp-mediatypes-perl_6.02-1_all.deb ...
Unpacking liblwp-mediatypes-perl (6.02-1) ...
Selecting previously unselected package liburi-perl.
Preparing to unpack .../08-liburi-perl_1.71-1_all.deb ...
Unpacking liburi-perl (1.71-1) ...
Selecting previously unselected package libhttp-message-perl.
Preparing to unpack .../09-libhttp-message-perl_6.11-1_all.deb ...
Unpacking libhttp-message-perl (6.11-1) ...
Selecting previously unselected package libhttp-daemon-perl.
Preparing to unpack .../10-libhttp-daemon-perl_6.01-1_all.deb ...
Unpacking libhttp-daemon-perl (6.01-1) ...
Selecting previously unselected package libipc-sharelite-perl.
Preparing to unpack .../11-libipc-sharelite-perl_0.17-4_armhf.deb ...
Unpacking libipc-sharelite-perl (0.17-4) ...
Selecting previously unselected package libjson-perl.
Preparing to unpack .../12-libjson-perl_2.90-1_all.deb ...
Unpacking libjson-perl (2.90-1) ...
Selecting previously unselected package libtypes-serialiser-perl.
Preparing to unpack .../13-libtypes-serialiser-perl_1.0-1_all.deb ...
Unpacking libtypes-serialiser-perl (1.0-1) ...
Selecting previously unselected package libjson-xs-perl.
Preparing to unpack .../14-libjson-xs-perl_3.030-1_armhf.deb ...
Unpacking libjson-xs-perl (3.030-1) ...
Selecting previously unselected package librrd8:armhf.
Preparing to unpack .../15-librrd8_1.6.0-1+b1_armhf.deb ...
Unpacking librrd8:armhf (1.6.0-1+b1) ...
Selecting previously unselected package librrds-perl:armhf.
Preparing to unpack .../16-librrds-perl_1.6.0-1+b1_armhf.deb ...
Unpacking librrds-perl:armhf (1.6.0-1+b1) ...
Selecting previously unselected package rpimonitor.
Preparing to unpack .../17-rpimonitor_2.12-r0_all.deb ...
Unpacking rpimonitor (2.12-r0) ...
Setting up libcommon-sense-perl (3.74-2) ...
Setting up libipc-sharelite-perl (0.17-4) ...
Setting up libdbi1:armhf (0.9.0-4+deb9u1) ...
Setting up libfile-which-perl (1.21-1) ...
Setting up libencode-locale-perl (1.05-1) ...
Setting up libtimedate-perl (2.3000-2) ...
Setting up libio-html-perl (1.001-1) ...
Setting up libtypes-serialiser-perl (1.0-1) ...
Setting up librrd8:armhf (1.6.0-1+b1) ...
Setting up liblwp-mediatypes-perl (6.02-1) ...
Processing triggers for libc-bin (2.24-11+deb9u1) ...
Setting up liburi-perl (1.71-1) ...
Processing triggers for systemd (232-25+deb9u1) ...
Processing triggers for man-db (2.7.6.1-2) ...
Setting up libjson-perl (2.90-1) ...
Setting up libhttp-date-perl (6.02-1) ...
Setting up libjson-xs-perl (3.030-1) ...
Setting up librrds-perl:armhf (1.6.0-1+b1) ...
Setting up libhttp-message-perl (6.11-1) ...
Setting up libhttp-daemon-perl (6.01-1) ...
Setting up rpimonitor (2.12-r0) ...
[ ok ] Restarting rpimonitor (via systemctl): rpimonitor.service.
root@raspberrypi2:/home/pi#
Wednesday, May 9, 2018
Installing lamp on a linux server (of course, the L is for that).
There is what seems to be a good page on this subject here
https://linoxide.com/linux-how-to/install-lamp-stack-ubuntu/
Wednesday, January 3, 2018
Thursday, July 6, 2017
Redhat EL7.3 XRDP install
http://www.itzgeek.com/how-tos/linux/centos-how-tos/install-xrdp-on-centos-7-rhel-7.html
xrdp is an Open Source Remote desktop Protocol server, which allows you to RDP to your Linux server from Windows machine; it is capable of accepting connections from rdesktop, freerdp, and remote desktop clients. This how to will help you to setup xrdp server on CentOS 7 / RHEL 7.
Prerequisites:
1. This was written when xrdp is available neither on CentOS repositories nor on EPEL repository, after a lot of Google search; i found desktop repository (http://li.nux.ro/) which was having xrdp for CentOS 7 / RHEL 7. We need to manually setup the repository on CentOS 7.2. Don’t forget to install Gnome on CentOS 7
Automatic (recommended):
Install EPEL and nux Desktop repository rpms.# rpm -Uvh https://dl.fedoraproject.org/pub/epel/7/x86_64/e/epel-release-7-5.noarch.rpm # rpm -Uvh http://li.nux.ro/download/nux/dextop/el7/x86_64/nux-dextop-release-0-1.el7.nux.noarch.rpm |
Manual:
Create a repository file.# vi /etc/yum.repos.d/xrdp.repo |
[xrdp] name=xrdp baseurl=http://li.nux.ro/download/nux/dextop/el7/x86_64/ enabled=1 gpgcheck=0 |
Installation:
Issue the following command to install xrdp# yum -y install xrdp tigervnc-server |
--> Running transaction check ---> Package xrdp.x86_64 0:0.6.1-2.el7.nux will be installed --> Finished Dependency Resolution Dependencies Resolved ================================================================================ Package Arch Version Repository Size ================================================================================ Installing: xrdp x86_64 0.6.1-2.el7.nux xrdp 271 k Transaction Summary ================================================================================ Install 1 Package Total download size: 271 k Installed size: 1.5 M Is this ok [y/d/N]: y Downloading packages: xrdp-0.6.1-2.el7.nux.x86_64.rpm | 271 kB 00:05 Running transaction check Running transaction test Transaction test succeeded Running transaction Installing : xrdp-0.6.1-2.el7.nux.x86_64 1/1 Verifying : xrdp-0.6.1-2.el7.nux.x86_64 1/1 Installed: xrdp.x86_64 0:0.6.1-2.el7.nux |
# systemctl start xrdp.service |
# netstat -antup | grep xrdp
tcp 0 0 0.0.0.0:3389 0.0.0.0:* LISTEN 1508/xrdp
tcp 0 0 127.0.0.1:3350 0.0.0.0:* LISTEN 1507/xrdp-sesman
|
# systemctl enable xrdp.service |
# firewall-cmd --permanent --zone=public --add-port=3389/tcp # firewall-cmd --reload |
# chcon --type=bin_t /usr/sbin/xrdp # chcon --type=bin_t /usr/sbin/xrdp-sesman
Test:
Now take rdp from any windows machine using Remote Desktop Connection, enter ip address of Linux server in computer field and click on connect.Thursday, October 13, 2016
Vmware ESXI 5.5 on core i5 Nuc
This page has some interesting notes employed in installing vmware esxi 5.5 on core i5 NUC. Though that is an older than the latest release, this has some good techniques for esxi, including package installation.
http://www.virten.net/2015/02/how-to-install-esxi-on-5th-gen-intel-nuc-nic-and-ahci-workaround/
Intel has begun to deliver their 5th Gen Broadwell NUCs. At the moment, only NUCs with i3 CPUs are available. NUCs with faster CPUs are available in the next few weeks. I could get my hands on the NUC5i3MYHE. That’s the version with a 2.5″ HDD slot and without integrated WLAN. This post quickly explains how to get ESXi running on the 5th Gen NUC. As known from 3th and 4th gen NUCs, it is not possible to use the ESXi Installer provided by VMware.
I’m confident that this guide will also work for i5 and i7 NUCs, as from what I’ve seen in the documentation they have identical controllers:
- Intel NUC5i7RYH
- Intel NUC5i5RYH
- Intel NUC5i5MYHE
- Intel NUC5i5RYK
- Intel NUC5i3RYH
- Intel NUC5i3MYHE
- Intel NUC5i3RYK
- NUC5i3MYHE ($300,-)
- Crucial 16GB Kit DDR3 1600 1.35V ($110,-)
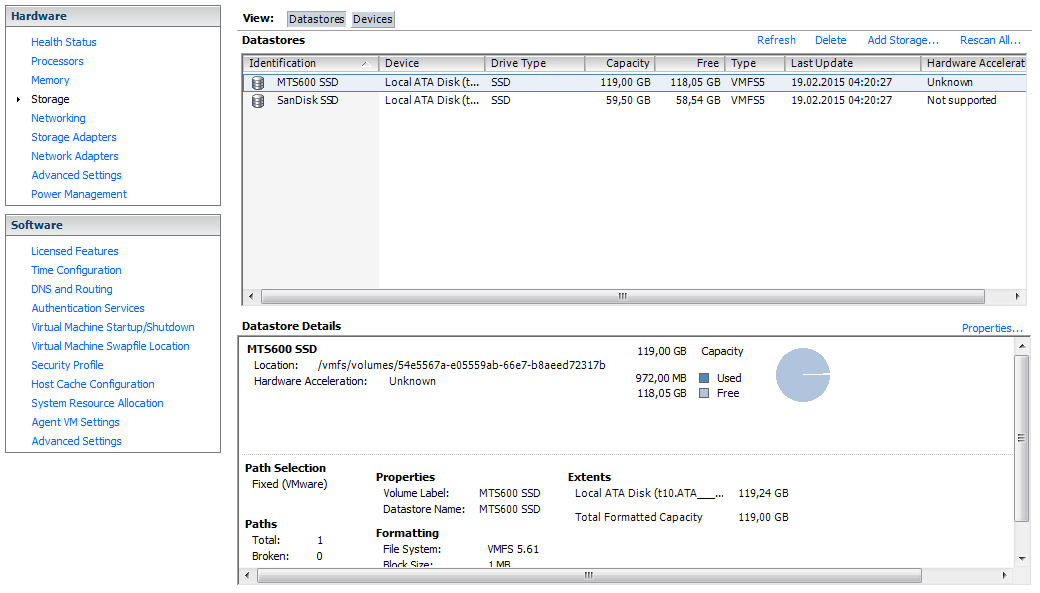
- Transcend MTS600 M.2 SSD 128GB ($60,-)
- 2.5″ SanDisk SSD (Reused from older tests)
- 8GB Kingston Digital DataTraveler
- NUC has a Mini HDMI and Mini DisplayPort. Make sure to have an adapter.
- Supported M.2 SSD sizes are 22×24, 22×60 and 22×80
- NUC requires 1.35V SODIMM Memory
No Network AdaptersYou have to create a customized ESXi Image. The custom driver has been created about a year ago by GLRoman and is available at VMware Community or at the vibsdepot from VMware Front Experience.
No network adapters were detected. Either no network adapters are physically connected to the system, or a suitable driver could not be located. A third party driver may be required.
Ensure that there is at least one network adapter physically connected to the system before attempting installation. If the problem persists, consult the VMware Knowledge Base.
You can either download ESXi and the e1000 driver manually, or simply use the following PowerCLI commands to create a customized ISO. This will download all required files automatically.
Add-EsxSoftwareDepot https://hostupdate.vmware.com/software/VUM/PRODUCTION/main/vmw-depot-index.xml Add-EsxSoftwareDepot http://vibsdepot.v-front.de New-EsxImageProfile -CloneProfile "ESXi-5.5.0-20150204001-standard" -name "ESXi-5.5.0-20150204001-NUC" -Vendor "virten.net" -AcceptanceLevel "CommunitySupported" Add-EsxSoftwarePackage -ImageProfile "ESXi-5.5.0-20150204001-NUC" -SoftwarePackage "net-e1000e" Add-EsxSoftwarePackage -ImageProfile "ESXi-5.5.0-20150204001-NUC" -SoftwarePackage "sata-xahci" Export-ESXImageProfile -ImageProfile "ESXi-5.5.0-20150204001-NUC" -ExportToISO -filepath ESXi-5.5.0-20150204001-NUC.iso
If you are unfamiliar with PowerCLI, read this post for a more detailed guide.
With this image you should be able to install ESXi 5.5 on a USB flash drive connected to the NUC.
No problem, we can fix that. First step is to determine the PCI ID:
~ # lspci -v | grep storage -A 1
0000:00:1f.2 SATA controller Mass storage controller: Intel Corporation Wildcat Point-LP SATA Controller [AHCI Mode]
Class 0106: 8086:9c83
The numbers we are looking for are 8086:9c83. We
have to add that to the AHCI driver map
(/etc/vmware/driver.map.d/ahci.map). Unfortunately we can’t edit this
file while ESXi is running. The changes have to be made to the file that
is loaded during ESXi startup (/bootbank/sata_ahc.v00). Convert the
file with vmtar, extract it, change the driver map and rebuild it to
/bootbank/. To do that, SSH to the ESXi and run the following commands:cd /tmp mkdir ahci cd ahci vmtar -x /bootbank/sata_ahc.v00 -o sata_ahc.tar tar xvf sata_ahc.tar rm sata_ahc.tar echo "regtype=linux,bus=pci,id=8086:9c83 0000:0000,driver=ahci,class=storage" >> etc/vmware/driver.map.d/ahci.map tar cvf sata_ahc.tar etc usr vmtar -c sata_ahc.tar -o sata_ahc.vgz mv sata_ahc.vgz /bootbank/sata_ahc.v00
Reboot ESXi and have fun with your 5th Gen NUC running ESXi 5.5
Additional Note: I’ve also tried to install ESXi 6.0 RC to the NUC. It was not required to create a custom ISO. The network card was detected during installation with the ISO provided by VMware. The AHCI workaround was still required. Please note that this was tested with beta software and might change when 6.0 is GA
Monday, September 26, 2016
vmware esxi 6 on Intel NUC
Just some notes for now, later will detail how install worked out
http://www.virten.net/2015/03/esxi-6-0-image-for-intel-nuc/
xx
install notes:
http://www.ivobeerens.nl/2016/02/24/intel-nuc-6th-generation-as-home-server/
http://www.ivobeerens.nl/2011/09/17/create-a-bootable-vmware-esxi-5-usb-stick-in-windows-and-perform-a-scripted-installation/
xx
http://tekhead.it/blog/category/nanolab/
xx
technique I used, rufus
http://www.virten.net/2016/01/vmware-homeserver-esxi-on-6th-gen-intel-nuc/
Installation
No customization is required to install the latest ESXi 5.5 and ESXi 6.0 versions on 6th Gen NUCs. You can use the images provided by VMware to Install ESXi:The simplest way to install ESXi is by using the original ISO and Rufus to create a bootable ESXi Installer USB Flash Drive.
****
Download Rufus. I have 2.9.934
http://rufus.akeo.ie/
Set the above options, and remember to select the disk image next to
"Create a bootable disk using" and select the iso file to be bootable.
Vmware ISO 6.0 was downloaded from here:
Vmware FREE-ESXI6
A link to the current vmware may have to be gotten by following links to get an evaluation version. The above is for reference, and is the version my systems run.
xx