setting time with ntp and other tools.
http://www.linuxhomenetworking.com/
see if ntp running: pgrep ntpd
stop service if running: service ntpd stop
set from known server ntpdate -u 64.250.177.145
Determining If NTP Is Synchronized Properly: ntpq -p
Wednesday, July 18, 2012

ntpd notes
http://kb.vmware.com/selfservice/microsites/search.do?language=en_US&cmd=displayKC&externalId=1339
service ntpd stop
ntpdate <server>
ntpq -p
servers
0.vmware.pool.ntp.org
1.vmware.pool.ntp.org
2.vmware.pool.ntp.org
Saturday, July 7, 2012
Symantec anti virus removal
Symantic anti-virus client removal when there is a password required is accomplished as in this article.
article
1. Open Registry Editor (regedit).
2. Navigate to the following registry key:
HKEY_LOCAL_MACHINE\SOFTWARE\INTEL\LANDesk\VirusPro tect6\CurrentVersion\Administrator Only\Security\
3. Change the value for useVPuninstallpassword key from 1 to 0.
4. Exit Registry Editor and now you can uninstall Symantec AntiVirus Client.
article
1. Open Registry Editor (regedit).
2. Navigate to the following registry key:
HKEY_LOCAL_MACHINE\SOFTWARE\INTEL\LANDesk\VirusPro tect6\CurrentVersion\Administrator Only\Security\
3. Change the value for useVPuninstallpassword key from 1 to 0.
4. Exit Registry Editor and now you can uninstall Symantec AntiVirus Client.
Thursday, July 5, 2012
vmware esxi network adapters
vmware
vlance, vmxnet, flexible, e1000, e1000e, vmxnet2, vmxnet3
Available Network Adapters
vlance, vmxnet, flexible, e1000, e1000e, vmxnet2, vmxnet3
Available Network Adapters
Only those
network adapters that are appropriate for the virtual machine you are
creating, are available configuration options in the Choose Networks window.
- Vlance
— An emulated version of the AMD 79C970 PCnet32- LANCE NIC, an older
10Mbps NIC with drivers available in most 32-bit guest operating systems
except Windows Vista and later. A virtual machine configured with this
network adapter can use its network immediately.
- VMXNET
— The VMXNET virtual network adapter has no physical counterpart.
VMXNET is optimized for performance in a virtual machine. Because
operating system vendors do not provide built-in drivers for this card,
you must install VMware Tools to have a driver for the VMXNET network
adapter available.
- Flexible
— The Flexible network adapter identifies itself as a Vlance adapter
when a virtual machine boots, but initializes itself and functions as
either a Vlance or a VMXNET adapter, depending on which driver
initializes it. With VMware Tools installed, the VMXNET driver changes
the Vlance adapter to the higher performance VMXNET adapter.
- E1000
— An emulated version of the Intel 82545EM Gigabit Ethernet NIC. A
driver for this NIC is not included with all guest operating systems.
Typically Linux versions 2.4.19 and later, Windows XP Professional x64
Edition and later, and Windows Server 2003 (32-bit) and later include
the E1000 driver.
Note: E1000 does not support jumbo frames prior to ESX/ESXi 4.1.
-
E1000e - This feature emulates a newer model of Intel gigabit NIC (number 82574) in the virtual hardware. This is known as the "e1000e" vNIC. e1000e is available only on hardware version 8 (and newer) VMs in vSphere5. It is the default vNIC for Windows 8 and newer (Windows) guest OSes. For Linux guests, e1000e is not available from the UI (e1000, flexible vmxnet, enhanced vmxnet, and vmxnet3 is available for Linux).
- VMXNET 2 (Enhanced)
— The VMXNET 2 adapter is based on the VMXNET adapter but provides some
high-performance features commonly used on modern networks, such as
jumbo frames and hardware offloads. This virtual network adapter is
available only for some guest operating systems on ESX/ESXi 3.5 and
later.
VMXNET 2 is supported only for a limited set of guest operating systems:
- 32- and 64-bit versions of Microsoft Windows 2003 (Enterprise, Datacenter, and Standard Editions).
Note: You can use enhanced VMXNET adapters with other versions of the Microsoft Windows 2003 operating system, but a workaround is required to enable the option in VMware Infrastructure (VI) Client or vSphere Client. See Enabling enhanced vmxnet adapters for Microsoft Windows Server 2003 (1007195) if Enhanced VMXNET is not offered as an option.
- 32-bit version of Microsoft Windows XP Professional
- 32- and 64-bit versions of Red Hat Enterprise Linux 5.0
- 32- and 64-bit versions of SUSE Linux Enterprise Server 10
- 64-bit versions of Red Hat Enterprise Linux 4.0
- 64-bit versions of Ubuntu Linux
- Microsoft Windows Server 2003, Standard Edition (32-bit)
- Microsoft Windows Server 2003, Standard Edition (64-bit)
- Microsoft Windows Server 2003, Web Edition
- Microsoft Windows Small Business Server 2003
- 32- and 64-bit versions of Microsoft Windows 2003 (Enterprise, Datacenter, and Standard Editions).
Note: Jumbo Frames are not supported in the Solaris Guest OS for VMXNET 2.
- VMXNET 3
— The VMXNET 3 adapter is the next generation of a paravirtualized NIC
designed for performance, and is not related to VMXNET or VMXNET 2. It
offers all the features available in VMXNET 2, and adds several new
features like multiqueue support (also known as Receive Side Scaling in
Windows), IPv6 offloads, and MSI/MSI-X interrupt delivery.
VMXNET 3 is supported only for virtual machines version 7 and later, with a limited set of guest operating systems:- 32- and 64-bit versions of Microsoft Windows XP,7, 2003, 2003 R2, 2008, and 2008 R2
- 32- and 64-bit versions of Red Hat Enterprise Linux 5.0 and later
- 32- and 64-bit versions of SUSE Linux Enterprise Server 10 and later
- 32- and 64-bit versions of Asianux 3 and later
- 32- and 64-bit versions of Debian 4
- 32- and 64-bit versions of Ubuntu 7.04 and later
- 32- and 64-bit versions of Sun Solaris 10 U4 and later
Notes:- In ESX/ESXi 4.1
and earlier releases, Jumbo Frames are not supported in the Solaris
Guest OS for VMXNET 2 and VMXNET 3. The feature is supported starting
with ESXi 5.0 for VMXNET 3 only.
For more information, see Enabling Jumbo Frames on the Solaris Guest OS (2012445).
- Fault Tolerance is not supported on a virtual machine configured with a VMXNET 3 vNIC in vSphere 4.0, but is fully supported on vSphere 4.1.
Thursday, June 28, 2012
notes about setting up wifi and camera on a raspberry pi
Has a lot of good notes about the task of adding a driver or drivers to a system and getting it going.
copied here because google lost the item and the web site 404's on it.
Raspberry Pi
Hi all.
Hopefully this will be of interest and help to someone trying to get a uvc webcam and/or realtek wifi dongle working on their rpi.
I hope this is the correct place to post this kind of topic.
*******************************************************************************************
Why.....
I wanted to have a rpi with a wifi dongle & a uvc logitech webcam and motion installed.
Problem.....
Arch, has the webcam modules but unable to get the rpi arch image to
support either of my 2 RTL8188CUS realtek based dongles.
: Belkin surf n150 micro adapter
: Edimax N150 Wireless nano USB Adaptor
Debian, doesn't immediately work with the dongle, but fairly easy to get working using this great
script: viewtopic.php?f=26&t=6256
But.... the default rpi Debian kernel doesn't have the uvc webcam stuff.
So I cant use the script above, because I need to bake in the webcam.
So...these instructions should enable you to have a:
1) debian based distro (custom kernel)
2) wifi working with RTL8188CUS based adapters.
3) logitech webcam working.
*******************************************************************************************
What you will need
1 x linux machine
1 x rpi
1 x SD card
Wired network between rpi & linux machine
1 X Realtek based wireless dongle. !DO NOT PLUG IN UNTIL TOLD TO!
1 X Logitech webcam
*******************************************************************************************
Getting started..
Prepare SD with the debian6-19-04-2012.zip image from http://www.raspberrypi.org/downloads
Lots of methods to do this.. take a look at:
http://elinux.org/RPi_Easy_SD_Card_Setup
Resize SD card if you need to gparted on your linux machine is your friend.
*******************************************************************************************
Boot for the first time.
Login as the user you have been given as part of the download for your initial image and change the password
Change your user (pi) password
Change the root passwd
Switch to root
Enter the password you just changed
Get everything up to date
At this point I normally (2xpi, 2xpowerAdapters ) get a kernel panic on first upgrade
Just pull plug out and reboot
Login as root this time
I want a fixed IP on this machine so I can find it when i disconnect the monitor
dont do this if you want the wired to be dhcp
*startOfDontDoThisIfYouDontWant
(of course you could you emacs here)
Change the following line
to
Then to write the file
* if after the next reboot you lose your ability to resolve hostnames
* i.e. ping google.com --> unknown host google.com
* just add:
* to the bottom of /etc/resolv.conf
endOfDontDoThisIfYouDontWant
To see (or check ) the address assigned to your eth0 network interface
eth0 inet addr, should be either a dhcp address or the one you set in the interfaces file.
Now I want to install Hexxeh/rpi-update tool
From here: https://github.com/Hexxeh/rpi-update
Dont worry if you get this:
* Always happens and no one seems worried about it.
Ok..... lets leave our rpi alone for a minute.
On our second linux (Ubuntu in my case) machine
(A lot of this next bit sourced from here: http://elinux.org/RPi_Kernel_Compilation)
Depending on your machine this might take a while.
(You can use -j flag if you have multi-core see notes on above url
you might have to press ENTER a lot)
This will have create a kernel image in: /home/yourUser/raspberrypi/linux/arch/arm/boot/
called: "zImage"
Now we need to copy it to our pi
* back on the pi....
You can check it mounted okay by:
* will show you that /mnt/linux is mounted to yourLinuxMachines linux directory
Now copy your new kernel over....
You can check it worked by doing this....
Fingers crossed
Now to get the wireless driver working........
Back on your Linux Machine.
Grab the UNIX (Linux) RTL8192CU driver package from http://www.realtek.com.tw
its a long url... but this shortLink should get you there.... http://goo.gl/81MRD
the file should be called something like this: RTL819xCU_USB_linux_v3.4.2_3727.20120404.zip
* Save the downloaded zip file in the wifi directory you just created
*! there must be a way of building this on the pi but I could not get it to work.
*! annoying as it means I cant use the install script.
[you will now see you have a brand spanking new]
8192cu.ko
kernel module, that has been compiled to work with the kernel you prepared earlier.
Back to the rPi
Blacklist bad module
Ok NOW plug in your wifi usb adapter..
You should see something like this......
Should give you something like this
Back on your linuxMachine
Lets reboot and make sure it all works then.....
Ok... the goal of this for me is a rpi with wifi, camera and motion so actually I need to set
the wifi address to be static so I can connect to it, otherwise it will keep changing and without
a keyboard and screen attached it will be a pain.
Login to your rpi as root (or just prefix all commands with sudo, up to you.)
change the following line
to
Then to write the file
This should give you something like this
Back on your linux machine open a terminal window and
* enter your password
OK all good, we dont need a screen or keyboard anymore.
Now unplug the keyboard from the rpi, we will need the usb for your webcam.
Plug your webcam in
You should see something like this...
* I have tried this with the following webcams...
* logitech c120
* logitech c160
* lets see if a video device has been created.
* ok good.
* almost there..
Install motion
Change: webcam_localhost on --> webcam_localhost off <--- this means we will be able to see the camera stream from other machines
Change: videodevice /dev/video0 To whatever video device was shown by ls -ltrh /dev/video*
Optional (but these are my settings):
Change: width 320 --> width 640 This will depend on your camera model.
Change: height 240 --> height 480
Change: framerate 25 --> http://www.lavrsen.dk/foswiki/bin/view/ ... nFramerate
Change: webcam_maxrate 25 --> http://www.lavrsen.dk/foswiki/bin/view/ ... camMaxrate
Change: output_normal on --> off , Im happy just to have the avi I can always jpeg split later if i want
Lets try it.
All done.
*******************************************************************************************
Hopefully this will be of use or interest to others, its quite long so if you spot any mistakes
feel free to point them out.
*******************************************************************************************
I have read a lot of web pages trying to get all this to work, and Im sure I will have forgotten
the authors of some.
But…thanks and credit to those below :
MrEngman --- viewtopic.php?f=26&t=6256
everyone who wrote this: http://elinux.org/RPi_Kernel_Compilation
http://elinux.org/index.php?title=RPi_K ... on=history
Cian's Blog --- http://www.cianmcgovern.com/tag/8192cu/
Hexxeh ---http://hexxeh.net/
Kenneth Lavrsen -- for maintaining motion.
http://www.69b.org/prox-pi.php/rpo/phpBB3/viewtopic.php?f=28&t=7585&p=93108&sid=e3ed9faa65b23072b6a52ada67d7d6a4
copied here because google lost the item and the web site 404's on it.
Raspberry Pi
Setup of motion, RTL8188CUS realtek based wifi & UVC webcam
2 posts
Hopefully this will be of interest and help to someone trying to get a uvc webcam and/or realtek wifi dongle working on their rpi.
I hope this is the correct place to post this kind of topic.
*******************************************************************************************
Why.....
I wanted to have a rpi with a wifi dongle & a uvc logitech webcam and motion installed.
Problem.....
Arch, has the webcam modules but unable to get the rpi arch image to
support either of my 2 RTL8188CUS realtek based dongles.
: Belkin surf n150 micro adapter
: Edimax N150 Wireless nano USB Adaptor
Debian, doesn't immediately work with the dongle, but fairly easy to get working using this great
script: viewtopic.php?f=26&t=6256
But.... the default rpi Debian kernel doesn't have the uvc webcam stuff.
So I cant use the script above, because I need to bake in the webcam.
So...these instructions should enable you to have a:
1) debian based distro (custom kernel)
2) wifi working with RTL8188CUS based adapters.
3) logitech webcam working.
*******************************************************************************************
What you will need
1 x linux machine
1 x rpi
1 x SD card
Wired network between rpi & linux machine
1 X Realtek based wireless dongle. !DO NOT PLUG IN UNTIL TOLD TO!
1 X Logitech webcam
*******************************************************************************************
Getting started..
Prepare SD with the debian6-19-04-2012.zip image from http://www.raspberrypi.org/downloads
Lots of methods to do this.. take a look at:
http://elinux.org/RPi_Easy_SD_Card_Setup
Resize SD card if you need to gparted on your linux machine is your friend.
*******************************************************************************************
Boot for the first time.
Login as the user you have been given as part of the download for your initial image and change the password
Change your user (pi) password
- Code: Select all
# passwd
Change the root passwd
- Code: Select all
# sudo passwd
Switch to root
- Code: Select all
# su
Enter the password you just changed
Get everything up to date
- Code: Select all
  # apt-get update
  # apt-get update [to clear duplicates]
  # apt-get upgrade
At this point I normally (2xpi, 2xpowerAdapters ) get a kernel panic on first upgrade
Just pull plug out and reboot
Login as root this time
- Code: Select all
# apt-get upgrade
I want a fixed IP on this machine so I can find it when i disconnect the monitor
dont do this if you want the wired to be dhcp
*startOfDontDoThisIfYouDontWant
- Code: Select all
# vi /etc/network/interfaces
(of course you could you emacs here)
Change the following line
- Code: Select all
iface eth0 inet dhcp
to
- Code: Select all
   iface eth0 inet static

    address 192.168.0.80     <---- whatever is applicable to your lan config
    netmask 255.255.255.0    <---- whatever is applicable to your lan config
    network 192.168.0.0      <---- whatever is applicable to your lan config
    gateway 192.169.0.1      <---- whatever is applicable to your lan config
Then to write the file
- Code: Select all
:wq!
- Code: Select all
   # ifdown eth0
    # ifup   eth0
* if after the next reboot you lose your ability to resolve hostnames
* i.e. ping google.com --> unknown host google.com
* just add:
- Code: Select all
nameserver 8.8.8.8 (or your favourite DNS server IP address)
* to the bottom of /etc/resolv.conf
endOfDontDoThisIfYouDontWant
To see (or check ) the address assigned to your eth0 network interface
- Code: Select all
# ifconfig
eth0 inet addr, should be either a dhcp address or the one you set in the interfaces file.
Now I want to install Hexxeh/rpi-update tool
From here: https://github.com/Hexxeh/rpi-update
- Code: Select all
 # cd
 # mkdir hexxeh
 # cd hexxeh
 # apt-get install ca-certificates
 # apt-get install git
- Code: Select all
 # wget http://goo.gl/1BOfJ -O /usr/bin/rpi-update && chmod +x /usr/bin/rpi-update
 # rpi-update
Dont worry if you get this:
- Code: Select all
 /opt/vc/sbin/vcfiled:
 error while loading shared libraries: libvchiq_arm.so: cannot open
shared object file: No such file or directory
* Always happens and no one seems worried about it.
Ok..... lets leave our rpi alone for a minute.
On our second linux (Ubuntu in my case) machine
(A lot of this next bit sourced from here: http://elinux.org/RPi_Kernel_Compilation)
- Code: Select all
  # sudo apt-get install gcc-4.6-arm-linux-gnueabi
  # sudo apt-get install git-core
  # cd
  # mkdir raspberrypi
  # cd raspberrypi
  # git clone https://github.com/raspberrypi/linux.git
  # cd linux
  # sudo ln -s  /usr/bin/arm-linux-gnueabi-gcc-4.6 /usr/bin/arm-linux-gnueabi-gcc
  # cp arch/arm/configs/bcmrpi_cutdown_defconfig .config
  # make ARCH=arm CROSS_COMPILE=/usr/bin/arm-linux-gnueabi- oldconfig
  # make ARCH=arm CROSS_COMPILE=/usr/bin/arm-linux-gnueabi- -k
Depending on your machine this might take a while.
(You can use -j flag if you have multi-core see notes on above url
you might have to press ENTER a lot)
This will have create a kernel image in: /home/yourUser/raspberrypi/linux/arch/arm/boot/
called: "zImage"
Now we need to copy it to our pi
* back on the pi....
- Code: Select all
  # apt-get install sshfs
  # cd /mnt
  # mkdir linux
  # sshfs yourUserName@yourLinuxMachineIPorHostname:/home/yourUser/raspberrypi/linux linux
You can check it mounted okay by:
- Code: Select all
# df -kh
* will show you that /mnt/linux is mounted to yourLinuxMachines linux directory
- Code: Select all
# cd linux
  # make modules_install
  # cd /boot
  # cp kernel.img /root/backup-original-kernel.img
Now copy your new kernel over....
- Code: Select all
# cp /mnt/linux/arch/arm/boot/zImage kernel.img
You can check it worked by doing this....
- Code: Select all
 # diff kernel.img /root/backup-original-kernel.img
  Binary files kernel.img and /root/backup-original-kernel.img differ

  #reboot
Fingers crossed
Now to get the wireless driver working........
Back on your Linux Machine.
- Code: Select all
  # cd
  # cd raspberrypi
  # mkdir wifi
Grab the UNIX (Linux) RTL8192CU driver package from http://www.realtek.com.tw
its a long url... but this shortLink should get you there.... http://goo.gl/81MRD
the file should be called something like this: RTL819xCU_USB_linux_v3.4.2_3727.20120404.zip
* Save the downloaded zip file in the wifi directory you just created
*! there must be a way of building this on the pi but I could not get it to work.
*! annoying as it means I cant use the install script.
- Code: Select all
  # cd
  # cd raspberrypi/wifi
  # unzip   RTL819xCU_USB_linux_v3.4.2_3727.20120404.zip
  # cd RTL8188C_8192C_8192D_USB_linux_v3.4.2_3727.20120404
  # cd driver
  # tar -zxvf rtl8188C_8192C_8192D_usb_linux_v3.4.2_3727.20120404.tar.gz
  # cd rtl8188C_8192C_8192D_usb_linux_v3.4.2_3727.20120404/
  # make KSRC=/home/yourUserName/raspberrypi/linux/ ARCH=arm CROSS_COMPILE=/usr/bin/arm-linux-gnueabi- -k
  # ls -ltrh
[you will now see you have a brand spanking new]
8192cu.ko
kernel module, that has been compiled to work with the kernel you prepared earlier.
Back to the rPi
- Code: Select all
 # cd /mnt
 # mkdir wifi
 # sshfs yourUserName@yourLinuxMachineIPorHostname:/home/yourUser/raspberrypi/wifi wifi
 # cd /mnt/wifi/RTL8188C_8192C_8192D_USB_linux_v3.4.2_3727.20120404/driver/rtl8188C_8192C_8192D_usb_linux_v3.4.2_3727.20120404
 # cp 8192cu.ko /root
 # cd
 # install -p -m 644 8192cu.ko /lib/modules/3.1.9+/kernel/drivers/net/wireless/
Blacklist bad module
- Code: Select all
 # echo 'blacklist rtl8192cu' >> /etc/modprobe.d/blacklist.conf
 #
 # echo >> /etc/network/interfaces   <--- put a blank line at the bottom of our interfaces file.
 # echo "allow-hotplug wlan0" >> /etc/network/interfaces   <---- if we want to allow hotplug of our adapter
 # echo >> /etc/network/interfaces
 # echo 'auto wlan0' >> /etc/network/interfaces   <-- create an entry for our wlan0
 # echo >> /etc/network/interfaces
 # echo 'iface wlan0 inet dhcp' >> /etc/network/interfaces  <-- we can change this to static if it works.
 # echo 'wpa-ssid "putYourSSIDhere" ' >> /etc/network/interfaces   <--- this is the name of your wireless Lan.
 # echo 'wpa-psk  "putYourWirelassPasswordHere" ' >> /etc/network/interfaces
 # echo '8192cu' >> /etc/modules
 # depmod -a
Ok NOW plug in your wifi usb adapter..
- Code: Select all
# iwconfig
You should see something like this......
- Code: Select all
lo        no wireless extensions.

eth0      no wireless extensions.

wlan0     IEEE 802.11bgn  ESSID:"YourWifiNetworkName"  Nickname:"<WIFI@REALTEK>"
          Mode:Managed  Frequency:2.462 GHz  Access Point: XX:YY:ZZ:AA:BB:CC
          Bit Rate:150 Mb/s   Sensitivity:0/0
          Retry:off   RTS thr:off   Fragment thr:off
          Encryption key:****-****-****-****-****-****-****-****   Security mode:open
          Power Management:off
          Link Quality=94/100  Signal level=44/100  Noise level=0/100
          Rx invalid nwid:0  Rx invalid crypt:0  Rx invalid frag:0
          Tx excessive retries:0  Invalid misc:0   Missed beacon:0
- Code: Select all
# ifconfig
Should give you something like this
- Code: Select all
wlan0     Link encap:Ethernet  HWaddr XX:YY:ZZ:AA:BB:CC
          inet addr:192.168.0.80  Bcast:192.168.0.255  Mask:255.255.255.0
          UP BROADCAST RUNNING MULTICAST  MTU:1500  Metric:1
          RX packets:304 errors:0 dropped:310 overruns:0 frame:0
          TX packets:32 errors:0 dropped:0 overruns:0 carrier:0
          collisions:0 txqueuelen:1000
          RX bytes:52965 (51.7 KiB)  TX bytes:4064 (3.9 KiB)
Back on your linuxMachine
- Code: Select all
# ping 192.168.0.81
64 bytes from 192.168.0.81: icmp_seq=0 ttl=64 time=0.993 ms
Lets reboot and make sure it all works then.....
- Code: Select all
# reboot
Ok... the goal of this for me is a rpi with wifi, camera and motion so actually I need to set
the wifi address to be static so I can connect to it, otherwise it will keep changing and without
a keyboard and screen attached it will be a pain.
Login to your rpi as root (or just prefix all commands with sudo, up to you.)
- Code: Select all
# vi /etc/network/interfaces
change the following line
- Code: Select all
iface wlan0 inet dhcp
to
- Code: Select all
    iface wlan0 inet static
    address 192.168.0.81     <---- whatever is applicable to your lan config, not an address handed by your dhcp server
    netmask 255.255.255.0    <---- whatever is applicable to your lan config
    network 192.168.0.0      <---- whatever is applicable to your lan config
    gateway 192.169.0.1      <---- whatever is applicable to your lan config
Then to write the file
- Code: Select all
:wq!
- Code: Select all
    # ifdown wlan0
    # ifup   wlan0
    # ifconfig
This should give you something like this
- Code: Select all
wlan0     Link encap:Ethernet  HWaddr XX:YY:ZZ:AA:BB:CC
          inet addr:192.168.0.80  Bcast:192.168.0.255  Mask:255.255.255.0
Back on your linux machine open a terminal window and
- Code: Select all
# ssh root@9192.168.0.81
* enter your password
- Code: Select all
## hostname
raspberrypi
OK all good, we dont need a screen or keyboard anymore.
Now unplug the keyboard from the rpi, we will need the usb for your webcam.
Plug your webcam in
- Code: Select all
# dmesg (in your terminal window)
You should see something like this...
- Code: Select all
usb 1-1.2: new high speed USB device number 6 using dwc_otg
usb 1-1.2: New USB device found, idVendor=046d, idProduct=0825
usb 1-1.2: New USB device strings: Mfr=0, Product=0, SerialNumber=2
usb 1-1.2: SerialNumber: AB81D3F0
Linux video capture interface: v2.00
uvcvideo: Found UVC 1.00 device <unnamed> (046d:0825)
input: UVC Camera (046d:0825) as /devices/platform/bcm2708_usb/usb1/1-1/1-1.2/1-1.2:1.0/input/input2
usbcore: registered new interface driver uvcvideo
USB Video Class driver (1.1.1)
6:3:1: cannot set freq 16000 to ep 0x86
6:3:2: cannot set freq 24000 to ep 0x86
6:3:3: cannot set freq 32000 to ep 0x86
6:3:4: cannot set freq 48000 to ep 0x86
usbcore: registered new interface driver snd-usb-audio
rtw_set_ps_mode(): Busy Traffic , Leave 802.11 power save..
rtl8192c_set_FwPwrMode_cmd(): Mode = 0, SmartPS = 0
* I have tried this with the following webcams...
* logitech c120
* logitech c160
* lets see if a video device has been created.
- Code: Select all
# ls -ltrh /dev/video*
crw-rw---- 1 root video 81, 0 Jun  4 18:42 /dev/video0
* ok good.
* almost there..
Install motion
- Code: Select all
# apt-get install motion
# apt-get install uvcdynctrl
# apt-get install guvcview
# vi /etc/motion/motion.conf
Change: webcam_localhost on --> webcam_localhost off <--- this means we will be able to see the camera stream from other machines
Change: videodevice /dev/video0 To whatever video device was shown by ls -ltrh /dev/video*
Optional (but these are my settings):
Change: width 320 --> width 640 This will depend on your camera model.
Change: height 240 --> height 480
Change: framerate 25 --> http://www.lavrsen.dk/foswiki/bin/view/ ... nFramerate
Change: webcam_maxrate 25 --> http://www.lavrsen.dk/foswiki/bin/view/ ... camMaxrate
Change: output_normal on --> off , Im happy just to have the avi I can always jpeg split later if i want
- Code: Select all
:wq! <--- Save your settings and exit.
Lets try it.
- Code: Select all
# motion
All done.
*******************************************************************************************
Hopefully this will be of use or interest to others, its quite long so if you spot any mistakes
feel free to point them out.
*******************************************************************************************
I have read a lot of web pages trying to get all this to work, and Im sure I will have forgotten
the authors of some.
But…thanks and credit to those below :
MrEngman --- viewtopic.php?f=26&t=6256
everyone who wrote this: http://elinux.org/RPi_Kernel_Compilation
http://elinux.org/index.php?title=RPi_K ... on=history
Cian's Blog --- http://www.cianmcgovern.com/tag/8192cu/
Hexxeh ---http://hexxeh.net/
Kenneth Lavrsen -- for maintaining motion.
http://www.69b.org/prox-pi.php/rpo/phpBB3/viewtopic.php?f=28&t=7585&p=93108&sid=e3ed9faa65b23072b6a52ada67d7d6a4
Saturday, May 5, 2012
Android test app work
Managed to run testview app on the G1


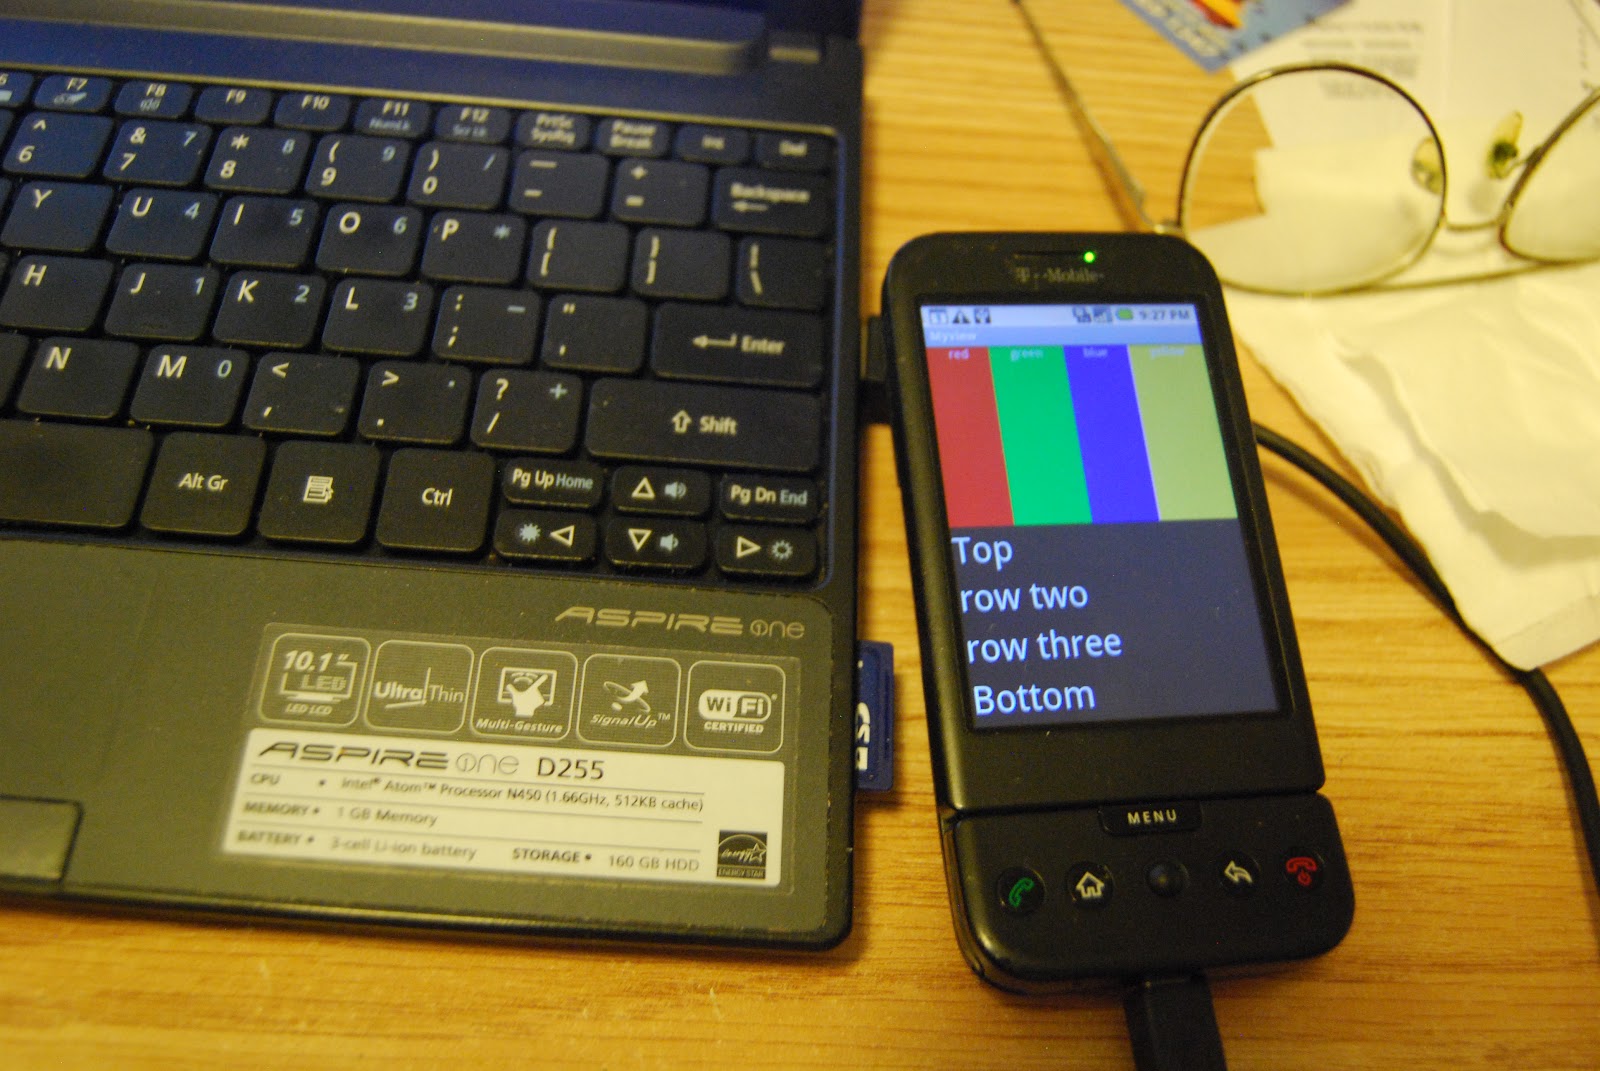
phone with app loaded

laptop attached, app running
Linear Layout app from android developer site
Tuesday, May 1, 2012
copy flv to mp4 or mp3 formatted videos with ffmpeg
copy stanza -vcodec copy -acodec copy
with audio re-encode
mp3 encode (requires codecs to be added)
ffmpeg -i input.flv -acodec libmp3lame -aq 4 output.mp3
additional codecs for 11.10
sudo apt-get -y install ffmpeg libavcodec-extra-52
or
sudo apt-get -y install ffmpeg libavcodec-extra-53
link to codec discussion:
http://ubuntuforums.org/showthread.php?t=1117283
link to encoding discussion:
http://ubuntuforums.org/showthread.php?t=1493682
ffmpeg -i input.flv -vcodec copy -acodec copy output.mp4
with audio re-encode
ffmpeg -i input.flv -vcodec copy -acodec mp2 -ar 44100 -ab 128k output.mp4
upgrade audio encode
ffmpeg -i input.flv -vcodec copy -acodec libfaac -aq 200 output.mp4
mp3 encode (requires codecs to be added)
ffmpeg -i input.flv -acodec libmp3lame -aq 4 output.mp3
additional codecs for 11.10
sudo apt-get -y install ffmpeg libavcodec-extra-52
or
sudo apt-get -y install ffmpeg libavcodec-extra-53
link to codec discussion:
http://ubuntuforums.org/showthread.php?t=1117283
link to encoding discussion:
http://ubuntuforums.org/showthread.php?t=1493682
Subscribe to:
Posts (Atom)